
https://tailwindcss.com/docs/installation/framework-guides/nuxt
分类目录
https://github.com/vbenjs/vite-plugin-svg-icons/
pnpm create vue

┌  Vue.js - The Progressive JavaScript Framework
◇  请输入项目名称:
│  vueSvg
│
◇  请输入包名称:
│  vuesvg
│
◇  请选择要包含的功能: (↑/↓ 切换,空格选择,a 全选,回车确认)
│  TypeScript, ESLint(错误预防), Prettier(代码格式化)
│
◇  选择要包含的试验特性: (↑/↓ 切换,空格选择,a 全选,回车确认)
│  none
│

正在初始化项目 C:\Users\Windows\Desktop\study\vue\primevue\vueSvg...
│
└  项目初始化完成,可执行以下命令:

   cd vueSvg
   pnpm install
   pnpm format
   pnpm dev

| 可选:使用以下命令在项目目录中初始化 Git:

   git init && git add -A && git commit -m "initial commit"
空的 vue 项目创建好后,开始安装 vite-plugin-svg-icons
以整个视口为单位,使用滑轮滚动或导航触发来达到展示效果的网站是一种需求。一种是自己手写 js + css 来达到这种效果。还有一种使用 fullpage.js 来达到这个效果。当然,使用 swiperjs 来实现这效果也是妥妥的赞,还很丝滑。
https://github.com/alvarotrigo/fullPage.js
https://swiperjs.com/get-started
主要是 fullpage.js 是需要花钱购买服务,而 swiperjs 是开源使用的。并且 swiperjs 不仅仅可以做这种视口滚动效果。
所以,这里选择使用 swiperjs 来完成目标。
DEMO 展示效果如下图所示(gif 使用 https://www.mnggiflab.com/ 录制和压缩):

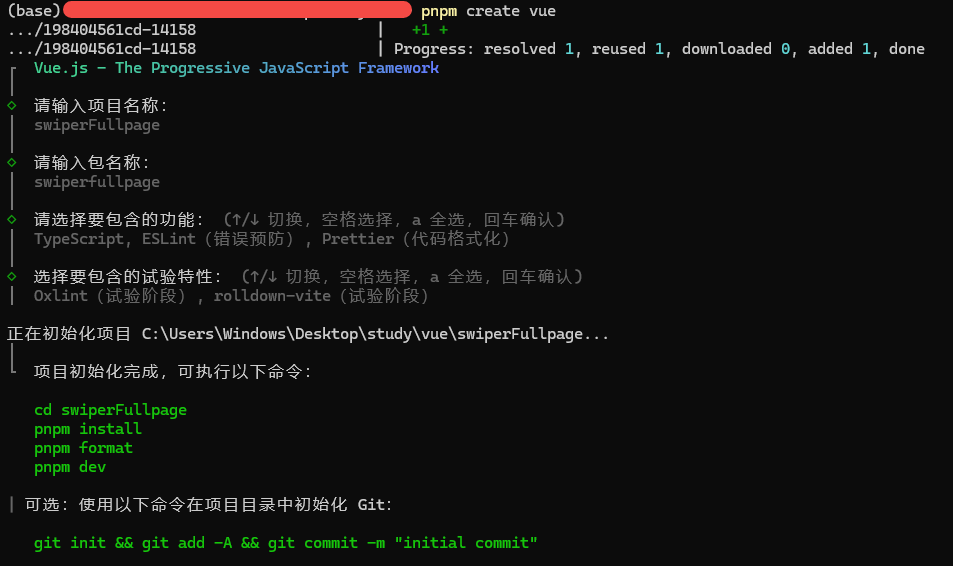
初始化一个 vue 项目。
pnpm create vue

cd swiperFullpage

pnpm install

pnpm format

pnpm dev
创建选项如下图所示。
然后,创建一个版本管理。
git init

git add .

git commit -m 'initialize'
先去掉 components 里的页面和默认样式。只留 App.vue 文件
rm -rf ./src/components
rm -rf ./src/assets
然后,修改 App.vue 文件。
<template>
  <h2>Home</h2>
</template>
删除 main.ts 中的样式引入。运行起来看看。没问题,添加 git 版本控制。
git add . && git commit -m '删除默认页面和样式'先安装 swiper。
pnpm add swiper开始在 App.vue 中编写相关的代码
<template>
  <swiper
    direction="vertical"
    :modules="[FreeMode, Mousewheel]"
    :space-between="0"
    :slides-per-view="'auto'"
    :allow-touch-move="false"
    :pagination="{ clickable: true }"
    :mousewheel="{ forceToAxis: true, sensitivity: 10, releaseOnEdges: true }"
    style="height: 100vh"
    class="swiper-pointer-events"
    @swiper="onSwiper"
    @slideChange="onSlideChange"
    ref="swiperRef"
  >
    <swiper-slide class="slide" style="background: #444">
      <div class="slide-content">
        <h2>点绛唇·屏却相思</h2>
        <p>屏却相思,近来知道都无益</p>
        <p>不成抛掷,梦里终相觅</p>
        <p>醒后楼台,与梦俱明灭</p>
        <p>西窗白,纷纷凉月,一院丁香雪</p>
      </div>
    </swiper-slide>

    <swiper-slide class="slide" style="background: #333">
      <div class="slide-content">
        <h2>《望江南》</h2>
        <p>多少恨,昨夜梦魂中</p>
        <p>还似旧时游上苑</p>
        <p>车如流水马如龙</p>
        <p>花月正春风</p>
      </div>
    </swiper-slide>

    <swiper-slide class="slide" style="background: #222">
      <div class="slide-content">
        <h2>《蟾宫曲·春情》</h2>
        <p>平生不会相思</p>
        <p>才会相思,便害相思</p>
        <p>身似浮萍,心如飞絮,气若游丝,</p>
        <p>空一缕余香在此</p>
      </div>
    </swiper-slide>

    <swiper-slide class="slide slide-footer" style="height: 240px; background: #111">
      <p>© 2025 Vini123.Com All rights reserved.</p>
    </swiper-slide>
  </swiper>
</template>

<script setup lang="ts">
import { ref } from 'vue'
import { Swiper, SwiperSlide } from 'swiper/vue'
import { FreeMode, Mousewheel } from 'swiper/modules'
import 'swiper/css'

const swiperRef = ref()
const activeIndex = ref(0)

const onSwiper = (swiper: any) => {
  swiperRef.value = swiper
  activeIndex.value = swiper.activeIndex
}
const onSlideChange = () => {
  if (swiperRef.value) {
    activeIndex.value = swiperRef.value.activeIndex
  }
}
</script>

<style>
html,
body {
  margin: 0;
  padding: 0;
}
</style>

<style scoped>
.slide {
  display: flex;
  align-items: center;
  justify-content: center;
  height: 100vh;
}

.slide-footer {
  color: #fff;
  align-items: flex-end;
  padding-bottom: 20px;
}

.slide-content {
  color: #fff;
  text-align: center;
  background: rgba(0, 0, 0, 0.4);
  padding: 30px 100px;
  border-radius: 24px;
}
</style>
这里要注意一点。并不是所有的页面都是整个视口的高度。比如底部的信息。这个时候需要设置 slides-per-view:auto 和 FreeMode。其他的根据实际情况操作。这里页面高度是整个视口的高度 100vh,有的时候,swiper 是某个页面的一部分,高度自然不一样。
运行起来看看,提交版本控制。
git add .
git commit -m '安装 swiper,编写 demo'111
后台管理系统,个人审美还是更喜欢 element-plus 多一点。如果组件更丰富点就更好了。
https://element-plus.org/zh-CN/guide/installation.html
# 安装
pnpm add element-plus

# 自动导入,安装unplugin-vue-components 和 unplugin-auto-import 这两款插件
pnpm add -D unplugin-vue-components unplugin-auto-import
配置自动导入
编辑 vite.config.ts
import { defineConfig } from 'vite'
import AutoImport from 'unplugin-auto-import/vite'
import Components from 'unplugin-vue-components/vite'
import { ElementPlusResolver } from 'unplugin-vue-components/resolvers'

export default defineConfig({
  // ...
  plugins: [
    // ...
    AutoImport({
      resolvers: [ElementPlusResolver()],
    }),
    Components({
      resolvers: [ElementPlusResolver()],
    }),
  ],
})
追加 AutoImport 和 Components 配置。完整的配置文件如下:
import { fileURLToPath, URL } from 'node:url'

import { defineConfig } from 'vite'
import vue from '@vitejs/plugin-vue'
import vueDevTools from 'vite-plugin-vue-devtools'
import AutoImport from 'unplugin-auto-import/vite'
import Components from 'unplugin-vue-components/vite'
import { ElementPlusResolver } from 'unplugin-vue-components/resolvers'

// https://vite.dev/config/
export default defineConfig({
  base: '/admin/',
  build: {
    outDir: 'admin',
    emptyOutDir: true,
    chunkSizeWarningLimit: 3000,
    rollupOptions: {
      output: {
        entryFileNames: 'assets/[name].[hash].js', // 入口文件名
        chunkFileNames: 'assets/[name].[hash].js', // chunk 文件名
        assetFileNames: 'assets/[name].[hash].[ext]', // 静态资源文件名
      },
    },
  },
  plugins: [
    vue(),
    vueDevTools(),
    AutoImport({
      resolvers: [ElementPlusResolver()],
    }),
    Components({
      resolvers: [ElementPlusResolver()],
    }),
  ],
  resolve: {
    alias: {
      '@': fileURLToPath(new URL('./src', import.meta.url)),
    },
  },
})
下边进行尝试使用
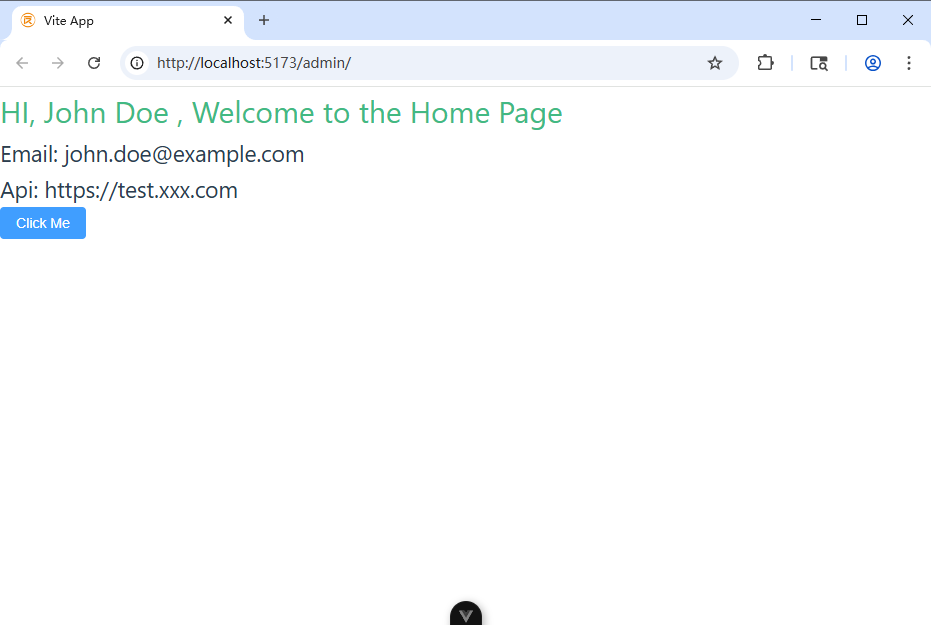
编辑 src/views/home/index.vue,增加按钮组件,尝试下效果。
<template>
  <div>
    <h1>HI, {{ user.name }} , Welcome to the Home Page</h1>
    <h2>Email: {{ user.email }}</h2>
    <h2>Api: {{ api }}</h2>
    <div>
      <el-button type="primary" @click="test">Click Me</el-button>
    </div>
  </div>
</template>

<script lang="ts" setup>
import { ref } from 'vue'

const user = ref<User>({
  id: 1,
  name: 'John Doe',
  email: 'john.doe@example.com',
  createdAt: new Date(),
})

const api = ref(import.meta.env.VITE_API_BASE_URL)

function test() {
  alert('Button Clicked!')
}
</script>

<style scoped>
h1 {
  color: #42b983;
  font-size: 2em;
}
</style>
运行起来,效果如下图所示。
vite7: https://vite.dev/blog/announcing-vite7
node: https://nodejs.org/en/download
现在创建一个叫 forgetting 的项目
pnpm self-update

pnpm create vue@latest

# 引导构建

┌  Vue.js - The Progressive JavaScript Framework
│
◇  请输入项目名称:
│  forgetting
│
◇  请选择要包含的功能: (↑/↓ 切换,空格选择,a 全选,回车确认)
│  TypeScript, Router(单页面应用开发), Pinia(状态管理), ESLint(错误预防), Prettier(代码格式化)
│
◇  选择要包含的试验特性: (↑/↓ 切换,空格选择,a 全选,回车确认)
│  Oxlint(试验阶段), rolldown-vite(试验阶段)

正在初始化项目 C:\Users\Windows\Desktop\study\vue\forgetting...
│
└  项目初始化完成,可执行以下命令:
创建完成后,执行下边命令,运行起来。
   cd forgetting
   pnpm install
   pnpm format
   pnpm dev
提交版本。
git init -b main
git add .
git commit -m 'initialize'rm -rf ./src/views/*
rm -rf ./src/components/*
rm -rf ./src/assets/logo.svgtouch ./src/views/home/index.vue
# 添加以下内容
<template>
<div>
<h1>Welcome to the Home Page</h1>
</div>
</template>修改 App.vue
<template>
  <RouterView />
</template>
调整路由 router.ts
import { createRouter, createWebHistory } from 'vue-router'

const router = createRouter({
  history: createWebHistory(import.meta.env.BASE_URL),
  routes: [
    {
      path: '/',
      name: 'home',
      component: () => import('../views/home/index.vue'),
    },
  ],
})

export default router
去掉 assets/main.css 中的其他代码,保留。
@import './base.css';

#app {
  margin: 0;
  padding: 0;
  font-weight: normal;
}

a,
.green {
  text-decoration: none;
  color: hsla(160, 100%, 37%, 1);
  transition: 0.4s;
  padding: 3px;
}pnpm dev
> forgetting@0.0.0 dev C:\Users\Windows\Desktop\study\vue\forgetting
> vite
Port 5173 is in use, trying another one...
ROLLDOWN-VITE v7.0.6 ready in 858 ms
➜ Local: http://localhost:5174/
➜ Network: use --host to expose
➜ Vue DevTools: Open http://localhost:5174/__devtools__/ as a separate window
➜ Vue DevTools: Press Alt(⌥)+Shift(⇧)+D in App to toggle the Vue DevTools
➜ press h + enter to show help可以执行代码检查
pnpm lint

> forgetting@0.0.0 lint C:\Users\Windows\Desktop\study\vue\forgetting
> run-s lint:*

> forgetting@0.0.0 lint:oxlint C:\Users\Windows\Desktop\study\vue\forgetting
> oxlint . --fix -D correctness --ignore-path .gitignore

Found 0 warnings and 0 errors.
Finished in 12ms on 8 files with 87 rules using 16 threads.

> forgetting@0.0.0 lint:eslint C:\Users\Windows\Desktop\study\vue\forgetting
> eslint . --fix

C:\Users\Windows\Desktop\study\vue\forgetting\src\views\home\index.vue
  1:1  error  Component name "index" should always be multi-word  vue/multi-word-component-names

✖ 1 problem (1 error, 0 warnings)

 ELIFECYCLE  Command failed with exit code 1.
ERROR: "lint:eslint" exited with 1.
ELIFECYCLE Command failed with exit code 1.官方默认的vue文件名是以大写字母开头,多单词的形式。或以中横线连接。个人喜欢以名字+动词的形式来定义文件。即以单数名字作为文件夹名,动词作为文件名。比如,想要一个创建订单的页面可以这样:order/create.vue,如果想要一个订单列表的页面就是 order/list.vue。 这种规则和默认规则相冲,eslint 检查出错误来。所以可以手动修改该策略。
对于组件命名,还是喜欢用大写字母开头,多单词的形式。 components/MediaPlayer/MediaPlayer.vue 。
修改 eslint.config.ts,增加规则来允许上边所说的消息单个单词的文件命名。
  {
    rules: {
      'vue/multi-word-component-names': 'off',
    },
  }
需要扩展和覆盖规则都可以在这里进行。因为是刚创建的项目,所以配置很干净除了新增这一条,其他都是默认的,完整如下:
import { globalIgnores } from 'eslint/config'
import { defineConfigWithVueTs, vueTsConfigs } from '@vue/eslint-config-typescript'
import pluginVue from 'eslint-plugin-vue'
import pluginOxlint from 'eslint-plugin-oxlint'
import skipFormatting from '@vue/eslint-config-prettier/skip-formatting'

// To allow more languages other than `ts` in `.vue` files, uncomment the following lines:
// import { configureVueProject } from '@vue/eslint-config-typescript'
// configureVueProject({ scriptLangs: ['ts', 'tsx'] })
// More info at https://github.com/vuejs/eslint-config-typescript/#advanced-setup

export default defineConfigWithVueTs(
  {
    name: 'app/files-to-lint',
    files: ['**/*.{ts,mts,tsx,vue}'],
  },

  globalIgnores(['**/dist/**', '**/dist-ssr/**', '**/coverage/**']),

  pluginVue.configs['flat/essential'],
  vueTsConfigs.recommended,
  ...pluginOxlint.configs['flat/recommended'],
  skipFormatting,
  {
    rules: {
      'vue/multi-word-component-names': 'off',
    },
  }
)
再执行 pnpm lint 就不会报错了。
执行 pnpm format 格式化代码。中间不规范操作,都可以通过这个来自动纠正。
提交版本。 git add . && git commit -m '删除默认页面、组件、样式,配置支持单个单词文件名的eslint规则'
在 vite 环境下,安装使用 simple-peer,报错 global is not defined 处理。
解决方法: https://github.com/feross/simple-peer/issues/883
这样引入就可以了:
import SimplePeer from 'simple-peer/simplepeer.min.js'如果遇到 Could not find a declaration file for module 'simple-peer/simplepeer.min.js'. 错误。可以在 env.d.ts 中增加定义就可以。
env.d.ts
declare module 'simple-peer/simplepeer.min.js'vue3 项目,配置了 ts 来开发。如果某一些组件,不使用 ts,编译的时候会报错。有时候并不是不想用 ts,只是那些文件是第三方编写的,又耦合比较高。这个时候,允许这些文件继续使用 js 来编写是一个需求。
这里以一个 LivePlayer 组件为例。
src/components/LivePlayer/LivePlayer.vue。 部分代码如下。这里没有设置 lang='ts',也没有使用 ts 的强类型。components<template>
<div class="relative overflow-hidden shrink-0 w-[320px] h-[405px]">
<div id="remoteVideo" class="w-[720px] h-[405px] ml-[-200px]"></div>
</div>
</template>
<script setup>
import { ref, onMounted } from 'vue';
const playIng = false
const urls = ref([])
function play(value) {
urls.push(value)
playVideo()
}
function playVideo() {
if (playIng) {
return
}
const url = urls.shift()
if (!url) {
return
}
playIng = true
// todo
}
defineExpose({ play })
</script>tsconfig.app.json 中加入黑名单,ts 编译器对这些文件不做处理。如:{
"extends": "@vue/tsconfig/tsconfig.dom.json",
"include": ["env.d.ts", "src/**/*", "src/**/*.vue"],
"exclude": ["src/**/__tests__/*", "src/components/LivePlayer/LivePlayer.vue"],
…typings 目录下,增加类型声明。typings 目录根据实际项目配置为准。// 定义一个接口来描述暴露给模板的属性或方法
interface LivePlayerExpose {
speakMessage: (value:string) => void
}
// 声明一个 Vue 组件实例类型,它扩展了 Vue 组件的基础类型,并添加了 LivePlayerExpose 接口
declare type LivePlayerComponent = InstanceType<DefineComponent<{}, {}, {}, {}>> & LivePlayerExpose
declare module '@/components/LivePlayer/LivePlayer.vue' {
import { DefineComponent } from 'vue'
const component: DefineComponent<{}, {}, {}, {}> & {
// 注意:这里我们并不直接导出 component,而是声明了它的类型
// 在实际使用时,Vue 会处理 component 的导出和注册
};
// 导出的是组件的实例类型,以便在模板或其他组件中引用时具有正确的类型
export default component
// 导出组件实例类型以供外部使用
export type Instance = LivePlayerComponent
}components<template>
<div class="w-full">
<LivePlayer ref="livePlayerRef" />
</div>
</template>
<script setup lang='ts'>
import { ref, onMounted } from 'vue';
const livePlayerRef = ref<InstanceType<typeof LivePlayer> | null>(null)
onMounted(() => {
livePlayerRef.value?.play("xxx")
})
</script>