12月
24
示例:
linux 、macOs
curl -o /dev/null -s \
-w "\n\
DNS 解析:       %{time_namelookup} s\n\
TCP 握手:       %{time_connect} s\n\
TLS 握手:       %{time_appconnect} s\n\
首字节 TTFB:    %{time_starttransfer} s\n\
总耗时:         %{time_total} s\n\
下载大小:       %{size_download} bytes\n\
HTTP 状态:      %{http_code}\n" \
https://xxx.xxx/xxx.js
win :
curl.exe -o nul -s \
-w "\n\
DNS 解析:       %{time_namelookup} s\n\
TCP 握手:       %{time_connect} s\n\
TLS 握手:       %{time_appconnect} s\n\
首字节 TTFB:    %{time_starttransfer} s\n\
总耗时:         %{time_total} s\n\
下载大小:       %{size_download} bytes\n\
HTTP 状态:      %{http_code}\n" \
https://xxx.xxx/xxx.js
-s 静默模式,屏蔽进度条和错误信息,只输出 -w 的内容。
输出结果示例如下:
DNS 解析:       0.029579 s
TCP 握手:       0.033574 s
TLS 握手:       0.044148 s
首字节 TTFB:    0.052129 s
总耗时:         0.491568 s
下载大小:       2159257 bytes
HTTP 状态:      200
11月
12
好几年前,ssl 免费证书有效期为 3 个月。搞一个能生成证书的环境就比较方便。
构建带 certbot 的 nginx 镜像
- 准备 Dockerfile 文件。
FROM nginx:1.29.3

# 安装 certbot https://certbot.eff.org/instructions?ws=nginx&os=snap
# 也可以在 nginx 之外使用 certbot 镜像 https://hub.docker.com/r/certbot/certbot
RUN apt-get update && \
    apt-get install -y python3-venv && \
    python3 -m venv /opt/certbot && \
    /opt/certbot/bin/pip install certbot certbot-nginx && \
    ln -s /opt/certbot/bin/certbot /usr/local/bin/certbot && \
    apt-get clean && \
    rm -rf /var/lib/apt/lists/*
-
打包镜像
docker build -t xr-nginx:1.29.3 .
-
运行镜像,生成容器服务。然后打开浏览器,输入 http://localhost 查看情况。
docker run --rm -it -p 80:80 --name xr-nginx xr-nginx:1.29.3

# 查看日志
docker run --rm -it -p 80:80 xr-nginx:1.29.3

# 进入容器
received
然后镜既有 nginx 的功能,还能生成证书。
生成证书
- 生成证书需要域名解析指向服务器。
- 需要挂载好证书存储位置,防止 docker 关闭启动后 丢失证书。( ./conf/nginx/letsencrypt:/etc/letsencrypt)
# 容器外运行
docker exec -i xr-nginx sh -c "certbot -d xxx.com"

# 进入容器运行
docker exec -it xr-nginx bash
certbot -d xxx.com
其他
https://blog.vini123.com/1299
https://blog.vini123.com/1293
11月
12
https://blog.csdn.net/weixin_39938069/article/details/144372076
构建国产东方通
- 准备好安装包和 license。
- 准备 Dockerfile 文件。
FROM alpine:3.18

# 1. 安装编译依赖
RUN apk add --no-cache \
        gcc g++ make autoconf automake libtool bison flex \
        openssl-dev zlib-dev pcre-dev tar

# 2. 复制源码和 license
COPY TongHttpServer_6.0.1.5_alpine_x86_64.tar.gz /tmp/
COPY license.dat /tmp/

# 3. 解压
RUN tar -zxf /tmp/TongHttpServer_6.0.1.5_alpine_x86_64.tar.gz -C /usr/local/ && \
    cp /tmp/license.dat /usr/local/THS/ && \
    rm -f /tmp/TongHttpServer_6.0.1.5_alpine_x86_64.tar.gz && \
    rm -f /tmp/license.dat

# 4. 设置工作目录
WORKDIR /usr/local/THS

# 暴露端口,根据需要修改
EXPOSE 80 443 8011 8000

# 启动 TongHttpServer
CMD ["./bin/start.sh"]
安装包有 x86 和 arm64,请和服务器对应上。
-
打包镜像。Dockerfile 文件、安装包、license 文件放一起。
docker build -t tong-http-server:6.0.1 .
-
运行镜像,看看效果
docker run -d --rm -p 8000:8000 -p 80:80 --name t1 \
  tong-http-server:6.0.1 \
  /bin/sh -c "./bin/start.sh && ./bin/startConsole.sh && tail -f /dev/null"

# 进入容器查看
docker exec -it t1 bash
浏览器访问 http://localhost:8000 进入控制台。
9月
29
dicebear 是一个优秀的开源头像生成库,为设计师和开发人员提供了创建头像的解决方案。除了完全随机生成的头像之外,还可以基于种子值创建确定性头像。借助内置的伪随机数生成器,我们可以根据相同的种子值反复生成头像。当然,也支持创建个性化头像,每种头像样式都提供了无数的可选项,满足大家的个性化需求,无论是抽象形状还是可爱角色形象,均能轻松搞定。
https://www.dicebear.com/playground/
https://github.com/dicebear/dicebear
https://www.dicebear.com/
https://www.dicebear.com/introduction/
他有很多风格可以选。
https://www.dicebear.com/styles/
比如,下边这两个链接。
9月
29
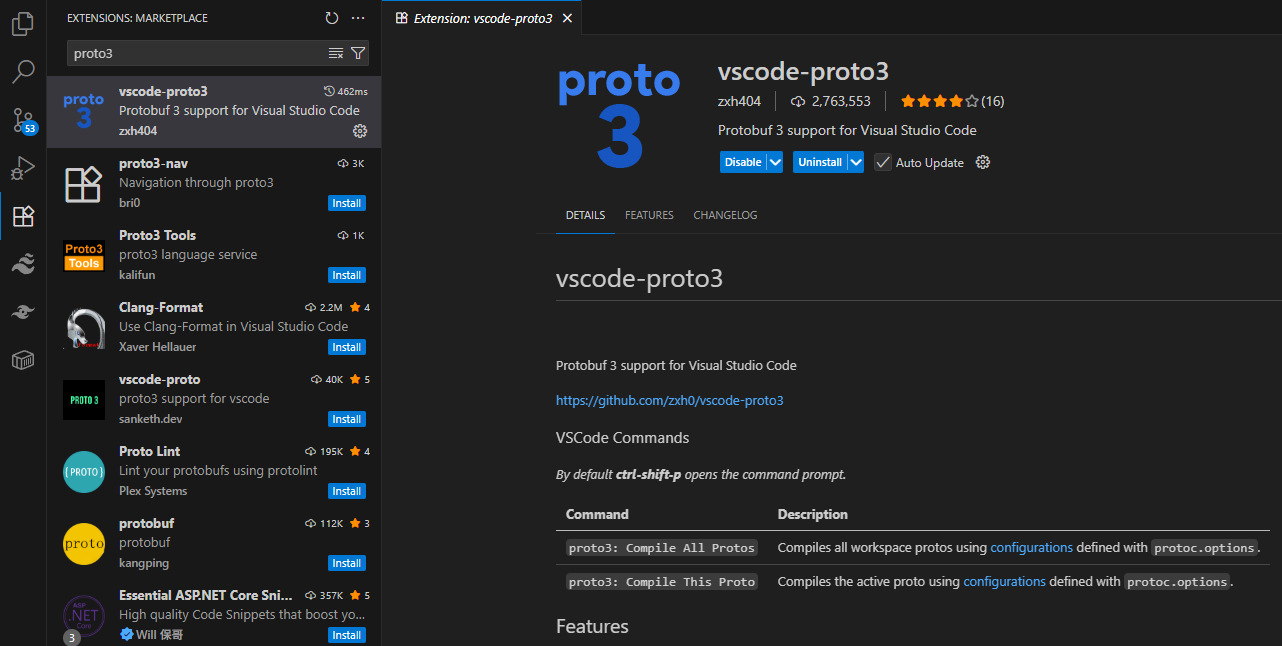
vscode 中格式化 protobuf 只需要下边几步就可以
-
安装 vscode-proto3 插件。
-
安装 llvm 。
https://releases.llvm.org/
scoop install llvm
-
重启 vscode 。
只要以上三步就可以实现 protbuf 的格式化。
vscode-proto3 不仅可以格式化,还有快速提示输入的功能。
安装 scoop
Scoop 在 Windows 世界里指的是 「Scoop 包管理器」。 一个专门给命令行程序做“apt / Homebrew”式安装的工具。它把软件装在用户目录下,不写注册表、不弹 UAC,一条命令就能装好并自动配好 PATH,因此常被开发者用来快速搭环境。一句话理解:Scoop = Windows 上的 “apt” 或 “Homebrew” 。
安装 scoop。在普通终端中输入以下命令安装。
Set-ExecutionPolicy RemoteSigned -Scope CurrentUser -Force
irm get.scoop.sh | iex

scoop help
7月
24
dify 使用 docker 部署是最方便的。只是拉取镜像的时候经常会失败。
配置 docker 镜像可方便拉取。
{
    "registry-mirrors": [
        "https://docker.1panel.live",
        "https://docker.nju.edu.cn",
        "https://docker.m.daocloud.io",
        "https://dockerproxy.com",
        "https://hub-mirror.c.163.com",
        "https://docker.mirrors.ustc.edu.cn",
        "https://registry.docker-cn.com",
        "https://registry.cn-hangzhou.aliyuncs.com"
    ]
}
5月
08
如果不需要泛域名证书,可以不用安装对应域名运营商的 cli 工具
nginx 镜像
仅安装 certbot 的 Dockerfile
ARG NGINX_IMAGE
FROM ${NGINX_IMAGE}

# 安装 certbot https://certbot.eff.org/instructions?ws=nginx&os=snap
# 也可以在 nginx 之外使用 certbot 镜像 https://hub.docker.com/r/certbot/certbot
RUN apt-get update && \
    apt-get install -y python3-venv && \
    python3 -m venv /opt/certbot && \
    /opt/certbot/bin/pip install certbot certbot-nginx && \
    ln -s /opt/certbot/bin/certbot /usr/local/bin/certbot && \
    apt-get clean && \
    rm -rf /var/lib/apt/lists/*
安装 certbot 和 aliyun cli 的Dockerfile
ARG NGINX_IMAGE
FROM ${NGINX_IMAGE}

# 安装 certbot https://certbot.eff.org/instructions?ws=nginx&os=snap
# 也可以在 nginx 之外使用 certbot 镜像 https://hub.docker.com/r/certbot/certbot
RUN apt-get update && \
    apt-get install -y wget python3-venv && \
    python3 -m venv /opt/certbot && \
    /opt/certbot/bin/pip install certbot certbot-nginx && \
    ln -s /opt/certbot/bin/certbot /usr/local/bin/certbot && \
    apt-get clean && \
    rm -rf /var/lib/apt/lists/*

# 安装阿里云 cli https://help.aliyun.com/zh/cli/install-cli-on-linux?spm=a2c4g.11174283.0.0.5df9478dHNZ4T9
# https://help.aliyun.com/zh/cli/run-alibaba-cloud-cli-in-a-docker-container
RUN mkdir -p /soft && \
    cd /soft && \
    wget -q https://aliyuncli.alicdn.com/aliyun-cli-linux-latest-amd64.tgz && \
    tar -xzvf aliyun-cli-linux-latest-amd64.tgz && \
    cp aliyun /usr/local/bin/ && \
    rm -rf /soft/aliyun-cli-linux-latest-amd64.tgz

# 验证阿里云 CLI 是否安装成功
RUN aliyun version
构建镜像,当前 nginx 最新版本是 1.28.0
docker build --build-arg NGINX_IMAGE=nginx:1.28.0 -t nginx-certbot .
手动生成证书
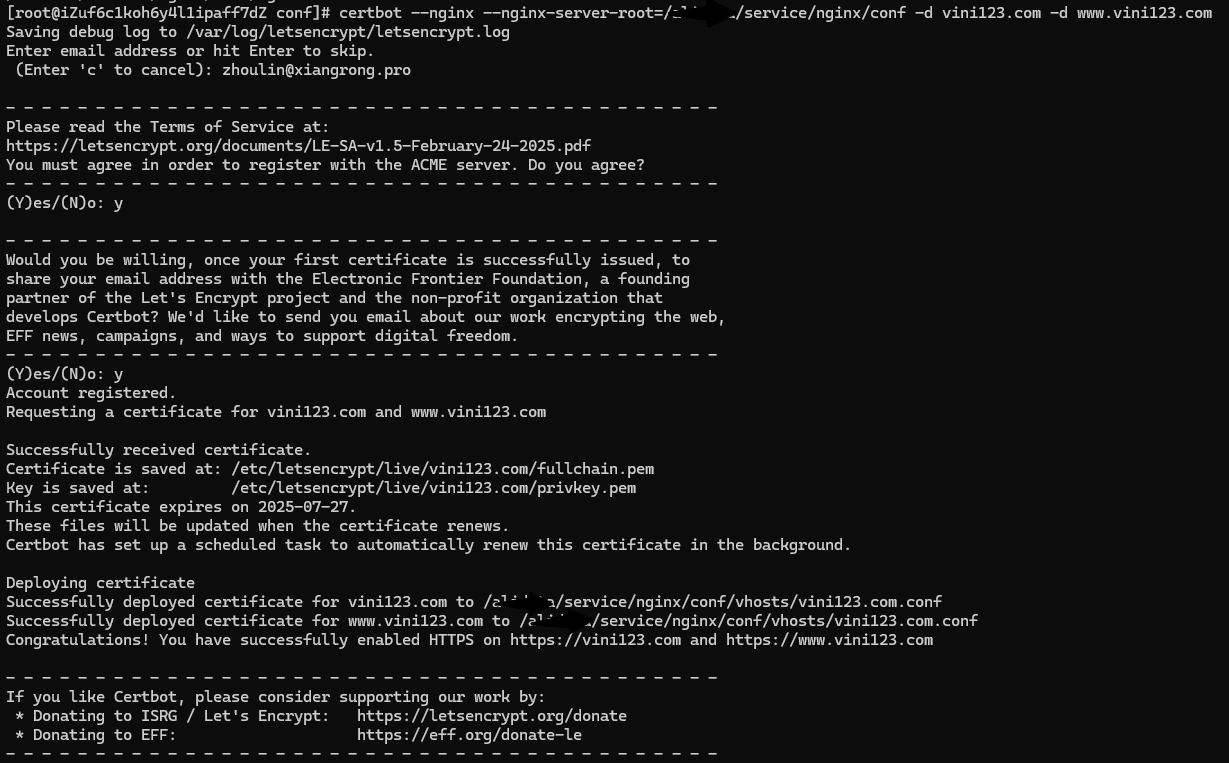
假设服务器上已经使用了该 nginx 镜像。并且配置文件目录是 /etc/nginx/。假如某个 .conf 文件使用了 vini123.com 的证书。就可以通过一下命令生成。
# 找到容器的名字或 id 前三位
docker ps

# 生成证书
docker exec -i nginx1.28.0 certbot --nginx --nginx-server-root=/etc/nginx -d vini123.com -d www.vini123.com
docker exec 常用 option 说明。
常用选项
-d:在后台运行命令。
-i:保持 STDIN 打开,即使没有附加。
-t:分配一个伪终端。
-u:指定在容器内执行命令的用户。
--workdir:指定容器内的工作目录。
注意
因为 certbot 安装在了 nginx 容器内。如果执行 docker-compose down 再执行 docker-compose up -d 就会丢失证书。所以在构建 nginx 容器的时候,一定要配置好证书的 volume。就是 certbot 生成的证书位置和本地宿主机的一个映射。
4月
28
https://certbot.eff.org/instructions?ws=nginx&os=snap&tab=standard
安装
安装 snapd
https://snapcraft.io/docs/installing-snap-on-centos
https://snapcraft.io/docs/installing-snapd
yum install snapd

systemctl enable --now snapd.socket

ln -s /var/lib/snapd/snap /snap
看看 snapd 状态。 snap changes
安装 certbot
snap install --classic certbot
建立软链
ln -s /snap/bin/certbot /usr/bin/certbot
生成证书
必须服务器先安装好 nginx。
生成单个域名证书
生第一个域名证书的时候,会让你输入 email,然后同意协议(y 回车即可)。生成一次后,后边的域名就直接生成了。
可以在任意位置执行该命令。
生成成功的同时,nginx 也一起重启了。也就是生成后,证书就 ok了。
证书续期
生成的证书有效期是 3 个月的。3个月后,需要新的证书。这里用续期处理。
certbot renew --dry-run
可以通过定时任务来续订。
生泛域名证书
参考
https://www.cnblogs.com/michaelshen/p/18538178
4月
22
go-stress-testing
https://github.com/link1st/go-stress-testing
如果没有环境可以去下作者编译好的: https://github.com/link1st/go-stress-testing/releases
go clone https://github.com/link1st/go-stress-testing.git

cd go-stress-testing

go build
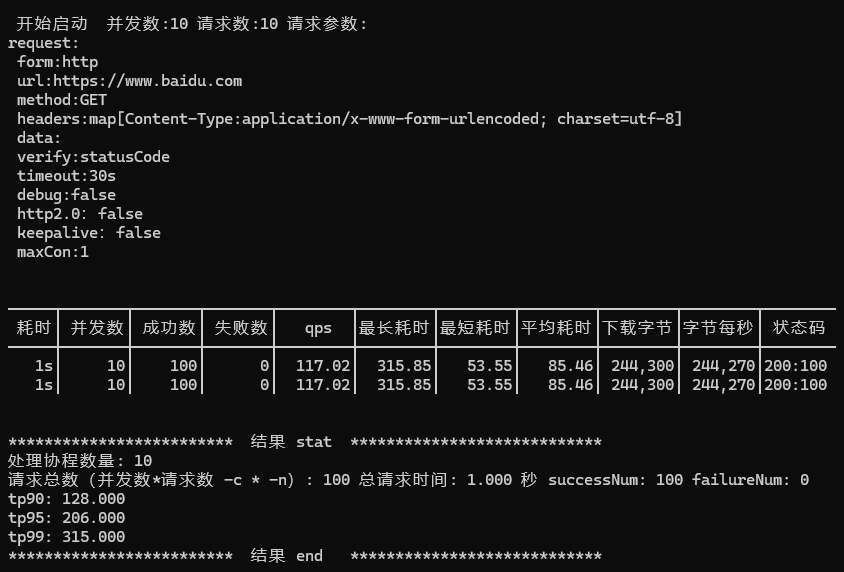
执行测试:
.\go-stress-testing.exe -c 10 -n 10 -u https://www.baidu.com
返回结果:
参考
https://cloud.tencent.com/developer/article/1509809
go-wrk
https://github.com/adjust/go-wrk
操作
自身系统有 go 环境。
git clone https://github.com/adjust/go-wrk.git
cd go-wrk
go mod init go-wrk
go build
执行测试。
./go-wrk [flags] url
例子:
./go-wrk -c=400 -t=8 -n=100000 http://localhost:8080/index.html
flags
 -H="User-Agent: go-wrk 0.1 bechmark\nContent-Type: text/html;": the http headers sent separated by '\n'
    -c=100: the max numbers of connections used
    -k=true: if keep-alives are disabled
    -i=false: if TLS security checks are disabled
    -m="GET": the http request method
    -n=1000: the total number of calls processed
    -t=1: the numbers of threads used
    -b="" the http request body
    -s="" if specified, it counts how often the searched string s is contained in the responses