
Sanctum 已经配置了,那么现在就做一个单页面,来进行测试。主要是做登录、注册的调用。这里使用 vue3。这里仅仅是测试,不作为项目代码的一部分,可以理解为是一个单独项目,但是调用的接口是项目文件里构建的。
新建 vue3 项目
# 创建项目
pnpm create vue

#配置如下图所示
# 不要 ts
# 也不要支持 jsx
# 需要 router
# 需要 pinia
# 许愿单元测试
# 不需要端到端测试
# 需要 eslint检查
# 需要美丽的格式化代码
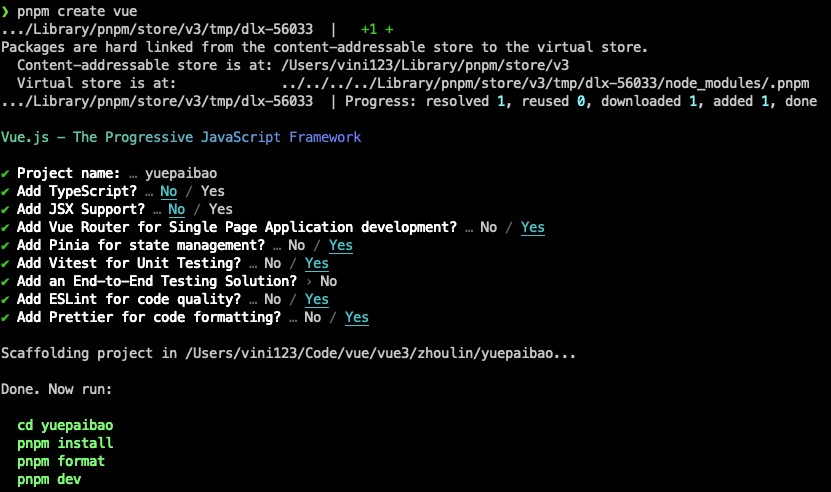
然后执行下边命令,把项目运行起来
cd yuepaibao
pnpm install
pnpm format
pnpm dev
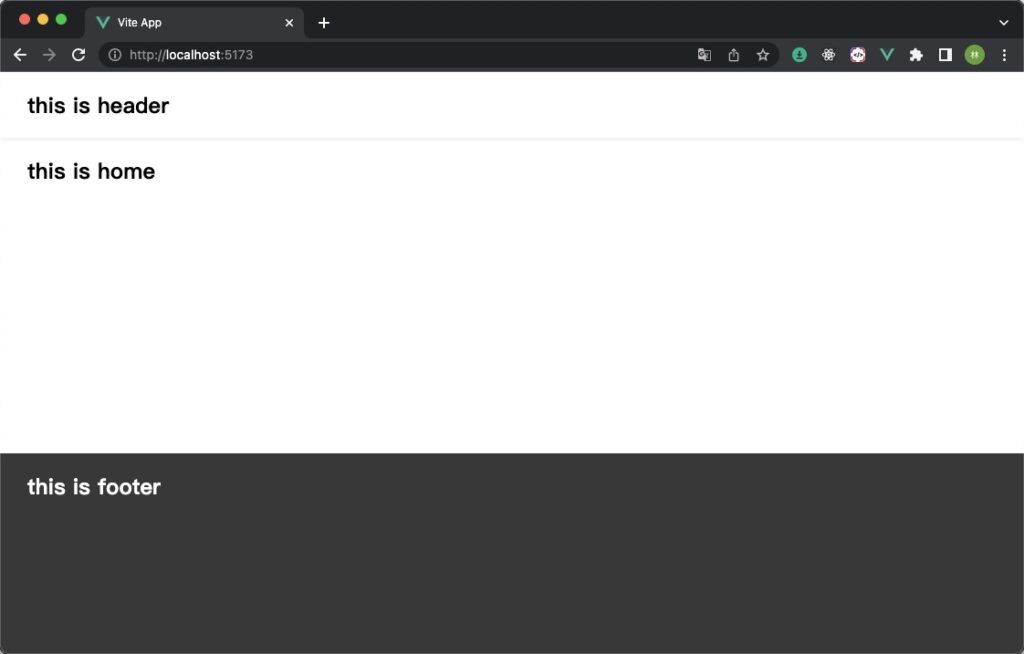
在浏览器中打开 http://localhost:5173/ 就可以访问到站点了。看到效果了。
我们养成好习惯,把代码添加到版本控制中。
git init -b main
git add .
git commit -m 'vue3 initialize'
对 eslint 和 prettier 进行配置
配置 eslint,修改 .eslintrc.cjs 文件
/* eslint-env node */
require('@rushstack/eslint-patch/modern-module-resolution')

module.exports = {
    root: true,
    extends: [
        './.eslintrc-auto-import.json',
        'plugin:vue/vue3-essential',
        'eslint:recommended',
        '@vue/eslint-config-prettier'
    ],
    parserOptions: {
        ecmaVersion: 'latest'
    },
    rules: {
        'no-console': process.env.NODE_ENV === 'production' ? 'warn' : 'off',
        'no-debugger': process.env.NODE_ENV === 'production' ? 'warn' : 'off',
        'comma-dangle': 0,
        'vue/multi-word-component-names': 'off',
        semi: ['warn', 'never']
    }
}
comma-dangle 为0,禁止在数据的尾部追随逗号
semi: ['warn', 'never'] 禁止尾部使用分号
'vue/multi-word-component-names': 'off' 允许组件命名为单个单词。比如 header.vue。
配置 prettier,修改 .prettierrc.json 文件
{
    "printWidth": 120,
    "tabWidth": 2,
    "useTabs": true,
    "semi": false,
    "singleQuote": true,
    "quoteProps": "as-needed",
    "bracketSpacing": true,
    "bracketSameLine": true,
    "arrowParens": "always",
    "vueIndentScriptAndStyle": false,
    "endOfLine": "auto",
    "trailingComma": "none"
}
整理页面
安装 sass
pnpm add -D sass
去掉不需要组件页面,删除main.css 和 base.css。再重新建立一个 main.scss 文件。到此,只有一个干净的 App.vue 文件和 main.scss 文件。这个时候肯定会报错的。我们接着整。
我们新建以下几个页面(习惯把公用的组件成为组件,其他的叫页面)。
.
├── home
│   └── index.vue
├── layouts
│   ├── footer.vue
│   └── header.vue
└── user
    ├── login.vue
    └── register.vue
然后,往里边加一些简单代码。如下:
header.vue
<template>
    <header>
      <h2>this is header</h2>
    </header>
  </template>

  <script setup>
  </script>

  <style lang="scss" scoped>
  header {
      display: flex;
      box-sizing: border-box;
      padding: 0 30px;
      width: 100%;
      height: 72px;
      background-color: #fff;
      box-shadow: 0 .125rem .25rem #00000013!important;
  }
  </style>
footer.vue
<template>
  <footer>
    <h2>this is footer</h2>
  </footer>
</template>

<script setup>
</script>

<style lang="scss" scoped>
footer {
    display: flex;
    width: 100%;
    height: 220px;
    background-color: #383838;
    box-sizing: border-box;
    padding: 0 30px;

    h2 {
        color: #fff;
    }
}
</style>
home.vue
<template>
  <div class="container">
    <h2>this is home</h2>
  </div>
</template>

<script setup>
</script>

<style lang="scss" scoped>
.container {
    box-sizing: border-box;
    padding: 0 30px;
}
</style>
login.vue
<template>
  <div class="">login</div>
</template>

<script setup>
</script>

<style lang="scss" scoped></style>
register.vue
<template>
  <div class="">register</div>
</template>

<script setup>
</script>

<style lang="scss" scoped></style>
然后修改 router/index.js
import { createRouter, createWebHistory } from 'vue-router'
import Home from '../views/home/index.vue'

const router = createRouter({
  history: createWebHistory(import.meta.env.BASE_URL),
  routes: [
    {
      path: '/',
      name: 'home',
      component: Home
    },
    {
      path: '/login',
      name: 'login',
      component: () => import('../views/user/login.vue')
    },
    {
      path: '/register',
      name: 'register',
      component: () => import('../views/user/register.vue')
    }
  ]
})

export default router
修改 App.vue,配合创建的这些页面
<script setup>
import { RouterView } from 'vue-router'

import Header from '@/views/layouts/header.vue'
import Footer from '@/views/layouts/footer.vue'

</script>

<template>
  <div class="main">
    <Header />
    <RouterView />
  </div>

  <Footer />
</template>

<style scoped>
</style>
最后修改 main.js,引入 css 改为引入 scss。就是文件名改一下。main.scss 填入以下 code。
html,body {
    margin: 0;
    padding: 0;
}

#app {
    display: flex;
    flex-direction: column;
    width: 100%;
    height: 100%;
    min-height: 100vh;

    .main {
        display: flex;
        flex-direction: column;
        flex:1;
    }
}
这样,一个基本的架构页面就出来了。如下图:
好了,提交代码。
git add .
git commit -m '构建基础页面'
下一步,就是找一个好看的 ui 库。写登录和注册表单逻辑。 elemeui 看多了,and design 也看多了,这里用 naiveui。好就这样。