习惯了服务端调用接口(unipush1),没有使用过云函数的朋友,又对 unipush2 的文档没完全操作一遍。一般会觉得 unipush2 的服务端调用有些奇怪。其实,如果按照文档走下去,也会没事。
其实,unipush2 的服务端调用和传统的服务端调用接口一样的。只是这里是调用的 dcloud 的 url。把那个 url 当做是服务端要调用的接口就可以了。
那这个 url 又怎么来,就是通过对建立的云函数 url 化就可以了。这里,重点就是讲怎么建立云函数以及怎么将云函数 url 化,还有通过 postman 进行测试。
其实,通过这种方式,更自由简单。只要读 dcloud 的文档就可以了,完全不考虑个推,也不用去注册个推账号。
准备工作
如果已打包成功,在 dcloud 上推送证书也配置好了,并且通过 dcloud 的后台测试成功过推送。准备工作就不用看了。直接看最后的正题如何建云函数以及 url 化,还有调用。
这里以 ios 端为例,以手机端基座为例。(正式版就是直接打包和换个证书)
准备打包 app
1.1 - 配置 app 模块。
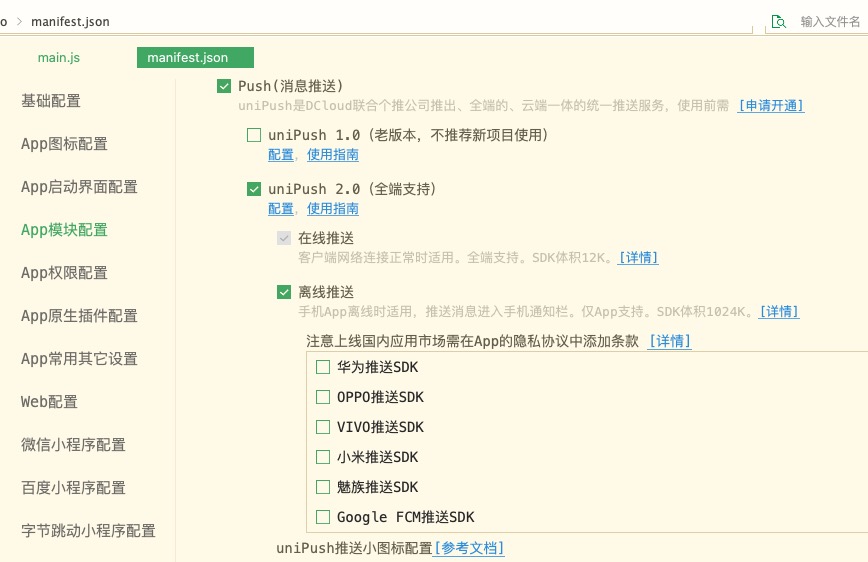
打开项目根目录下的 manifest.json 文件, 切换到 App模块配置, 按图这样勾选,保存。
1.2 打包基座。
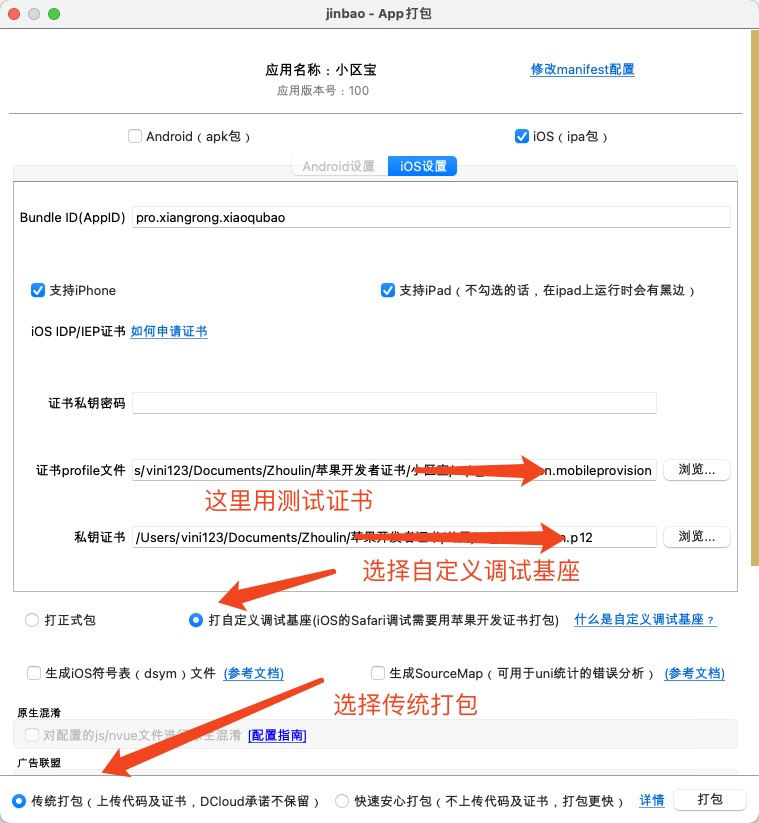
点击顶部菜单, 发行->原生App-云打包,出现弹窗, 按上图这样配置,打包基座。会提示您打包成功或失败。肯定要成功哈。有了基座就方便干事了。
1.3 运行到基座。
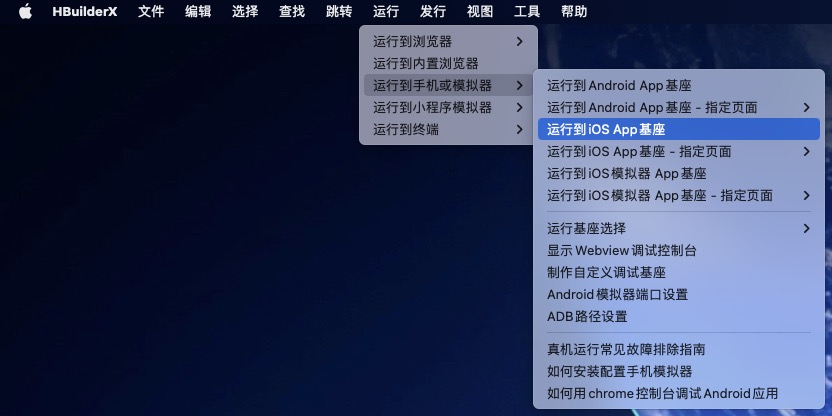
将手机和 mac 连接好。点击顶部菜单,运行->运行到手机或模拟器->运行到iOS App基座,弹窗,确定直到提示成功,手机那边启动 app就好了。
1.4 在手机端打开 app,同意各种权限。
dcloud 后台配置证书
推送虽然用到个推,可用户不用管个推,dcloud 官方自己管就可以。
点击下边链接,进入到 dcloud 开发中心进行证书配置。一定要选择好对应的 app, 就是当前应用选择。
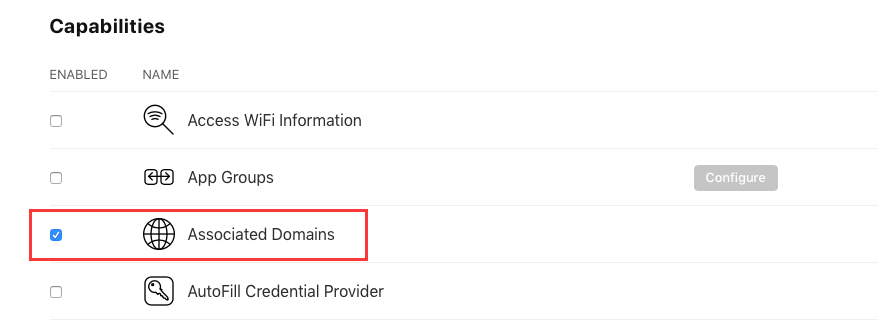
点击侧边栏,选择 应用信息,开始配置信息,iOS BundleId 配正确,关联服务空间选选好。
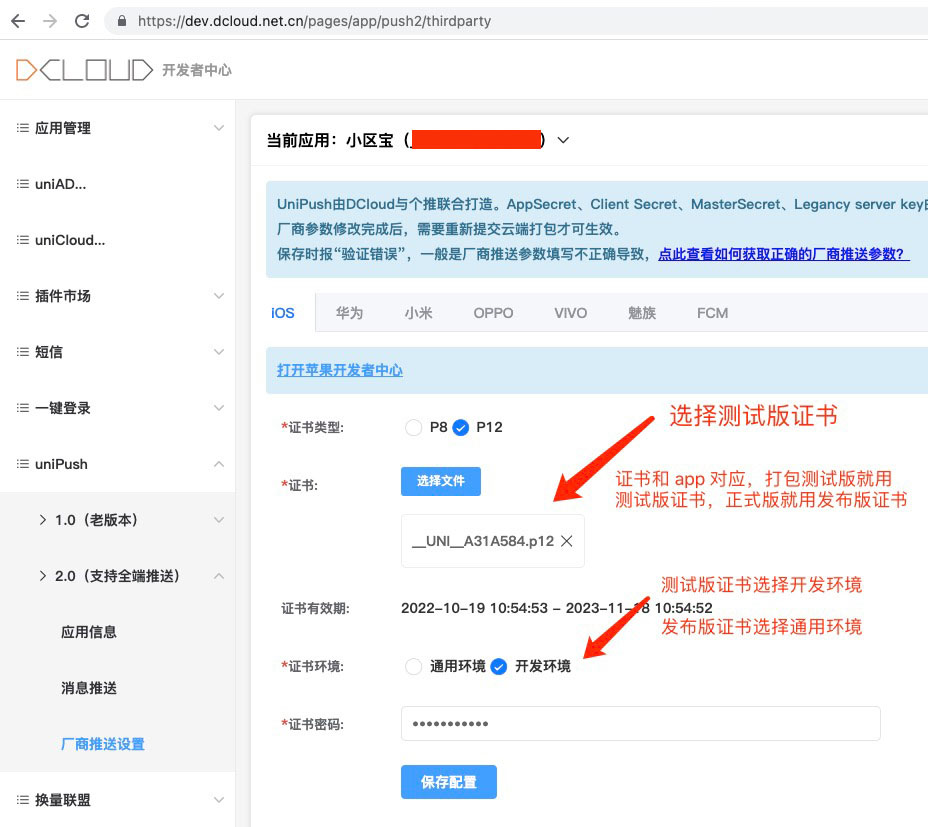
再点击侧边栏的 厂商推送设置,如上图所示,进行配置。
https://dev.dcloud.net.cn/pages/app/push2/thirdparty
dcloud 后台测试推送
获取 cid
        uni.getPushClientId({
            success: (res) => {
                let push_clientid = res.cid
                console.log('客户端推送标识:',push_clientid)
            },
            fail(err) {
                console.log(err)
            }
        });
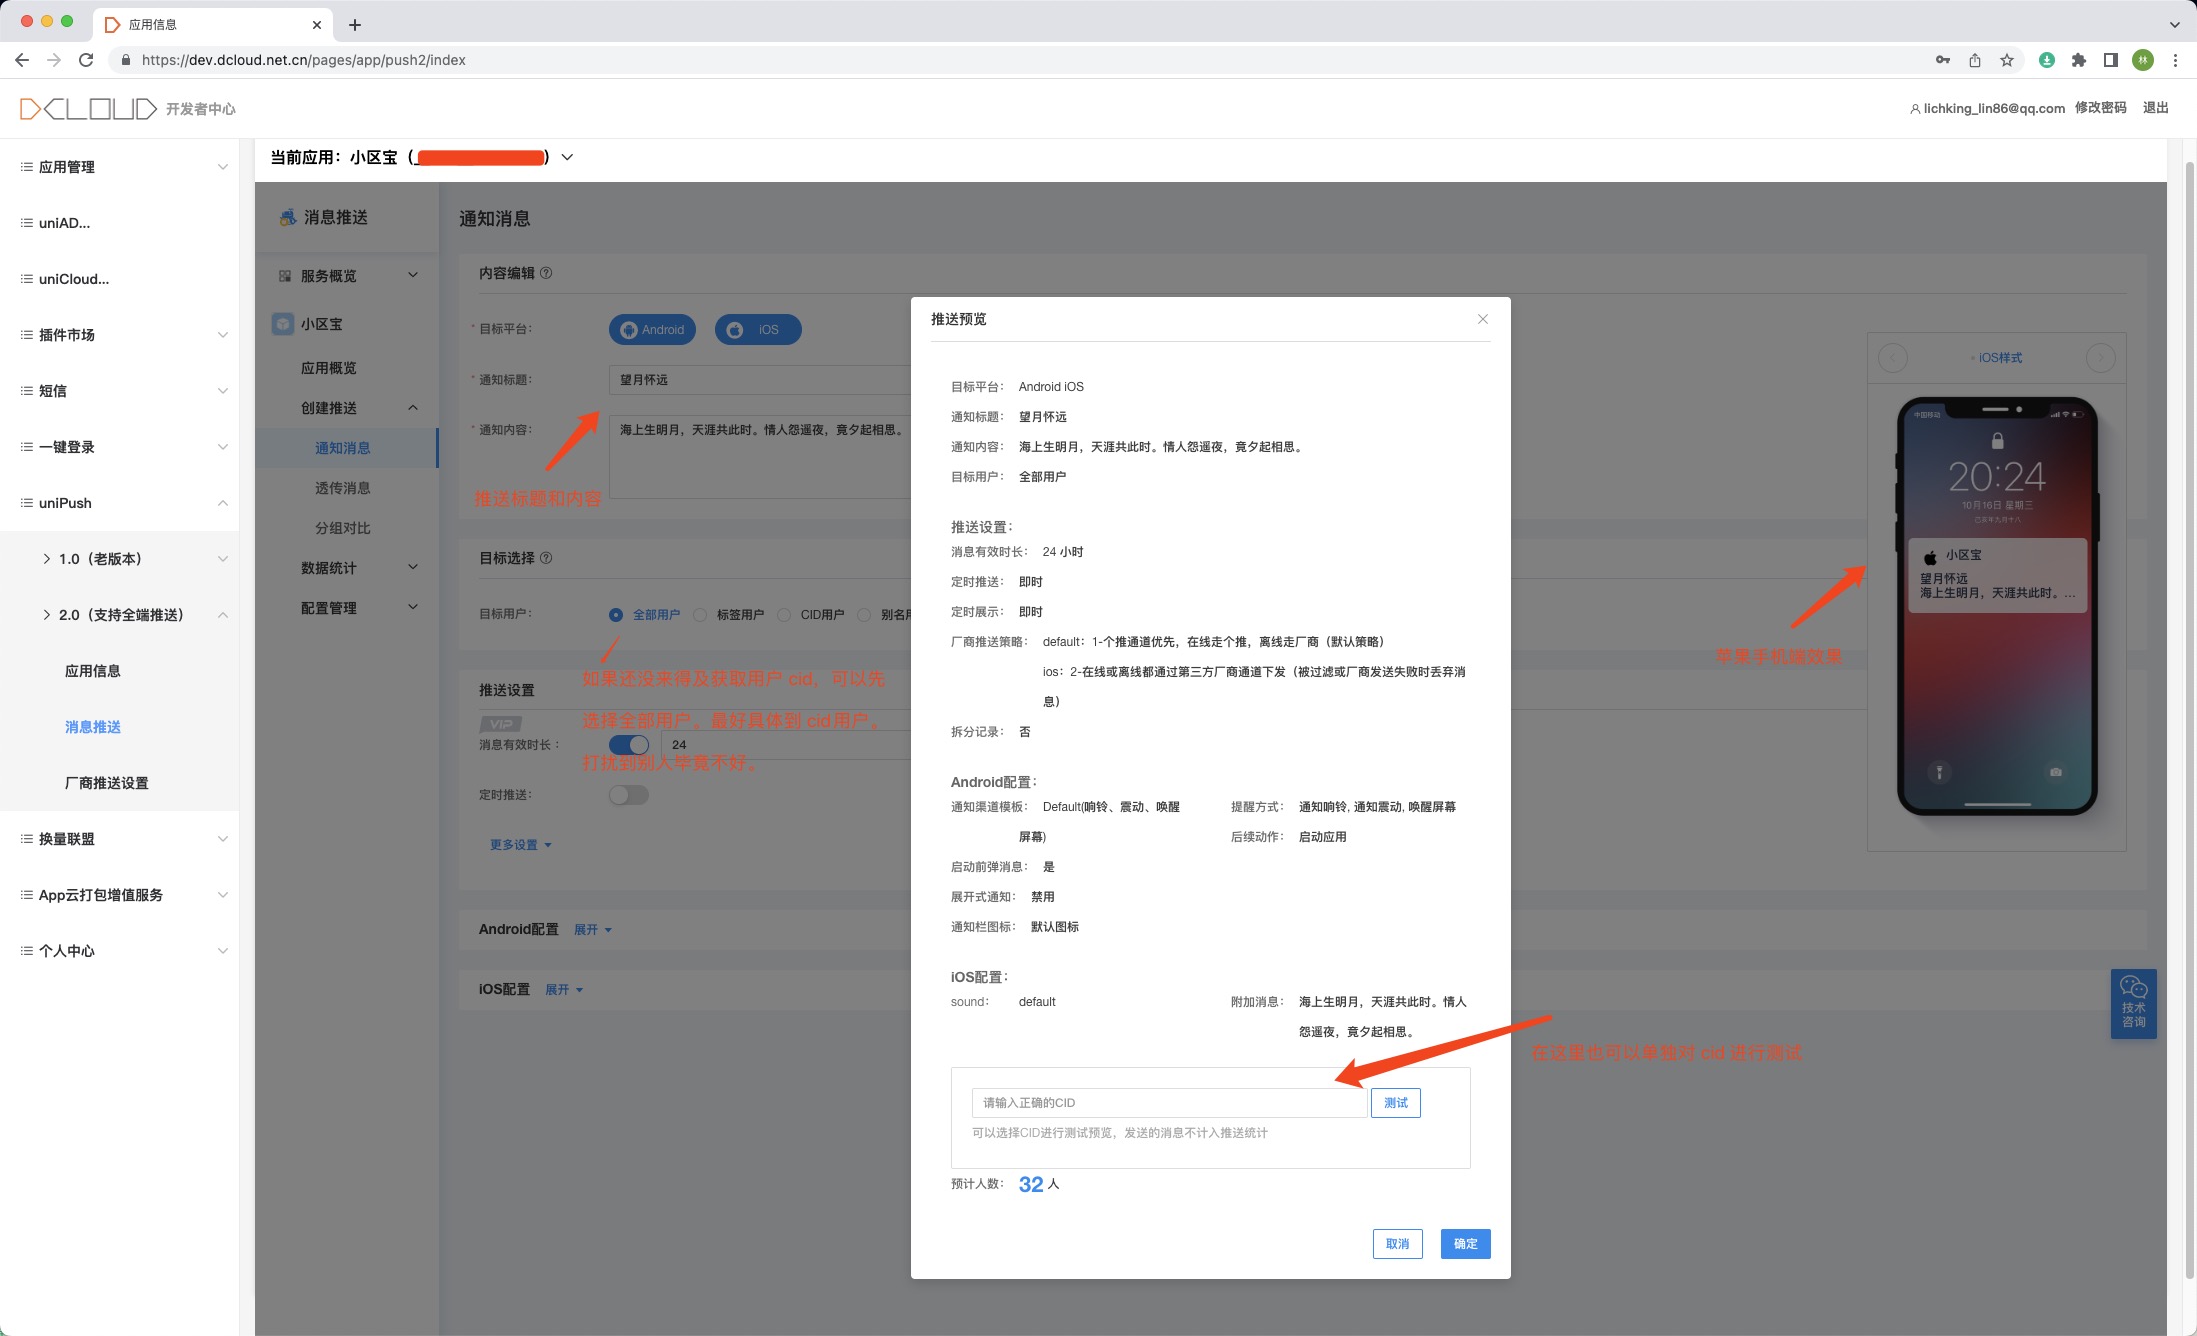
如果前边的动作都正确,你应该会收到推送的。
到这里一定要保证能收到通知。到此,仅仅是使用 dcloud 的后台测试,不能用于正式项目场景。正式项目场景往往需要通过后端接口调用推送。比如有人支付了一个报名了一个活动。可以通过后端把这个推送信息发送到活动发布者那里,告诉他有人参加了活动,请及时处理。
新建云函数
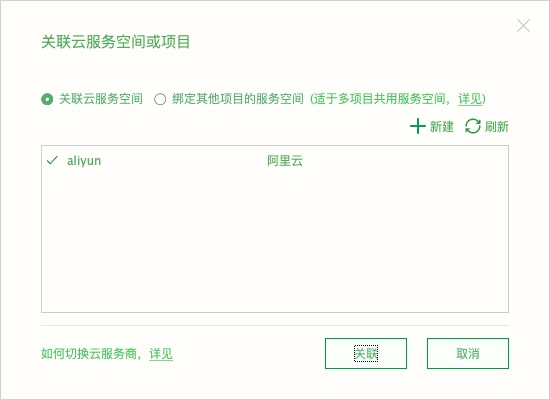
1.1 创建云开发环境,关联云服务空间
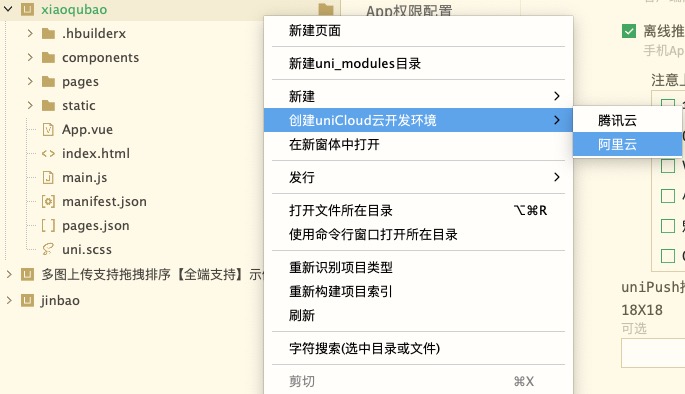
鼠标放在项目名称上,右键选择 创建uniCloud云开发环境,选择 阿里云。选择什么云,和你在 dcloud 后台创建关联的云一样就可以了。先默认创建一个云开发环境。
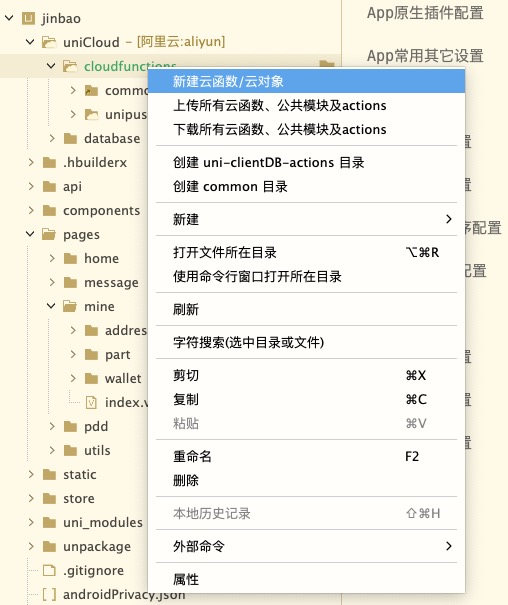
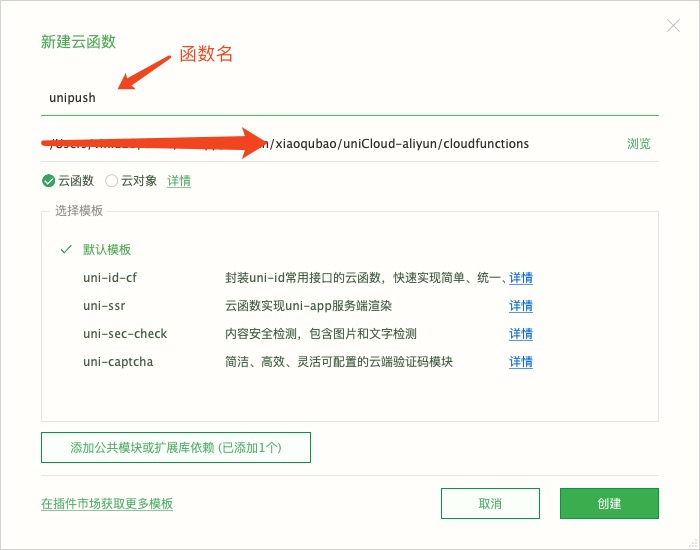
1.2 创建云函数
1.3 配置和编写云函数
package.json
{
  "name": "unipush",
  "version": "1.0.0",
  "main": "index.js",
  "description": "消息推送",
  "extensions": {
    "uni-cloud-push": {}
  },
  "author": "vini123"
}
index.js
'use strict';

exports.main = async (event, context) => {
    let body = event.body;
    if (event.isBase64Encoded) {
        body = Buffer.from(body);
    }

    if(!body) {
        return { message: 'no body'};
    }

    const param = JSON.parse(body);

    // 云函数是通用的,和项目没有直接的关系。通过传递 appId,可以为多个项目进行推送
    const uniPush = uniCloud.getPushManager({
        appId: param.appId
    });

    return await uniPush.sendMessage({
        "push_clientid": param.push_clientid,
        "title": param.title,
        "content": param.content,
        "payload": param.payload,
        "force_notification": true,
        "request_id": param.request_id,
        "badge": param.badge
    });
};
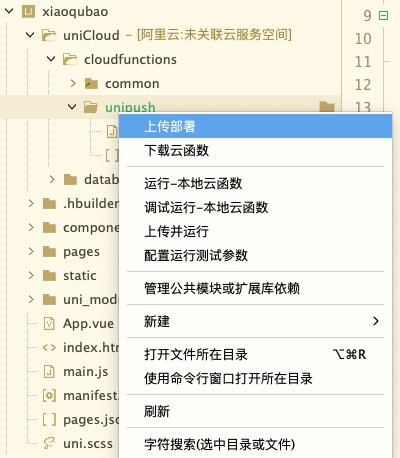
1.4 上传和运行云函数。因为该函数写了需要接受参数,不方便直接运行。如果想直接运行,将上边的参数直接写死。直接 send。鼠标右键上传并运行 就好。这里是动态的,仅仅上传部署就好了。
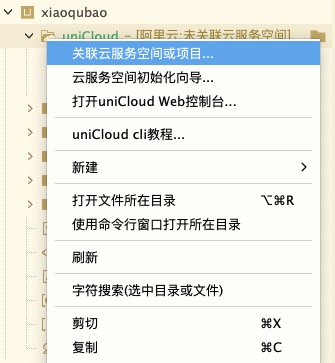
同名函数会相互覆盖。记得记得。所以这里 unipush 就要做一个通用的。(未关联云服务空间是不能上传的,先进行关联)
1.5 后台查看云函数
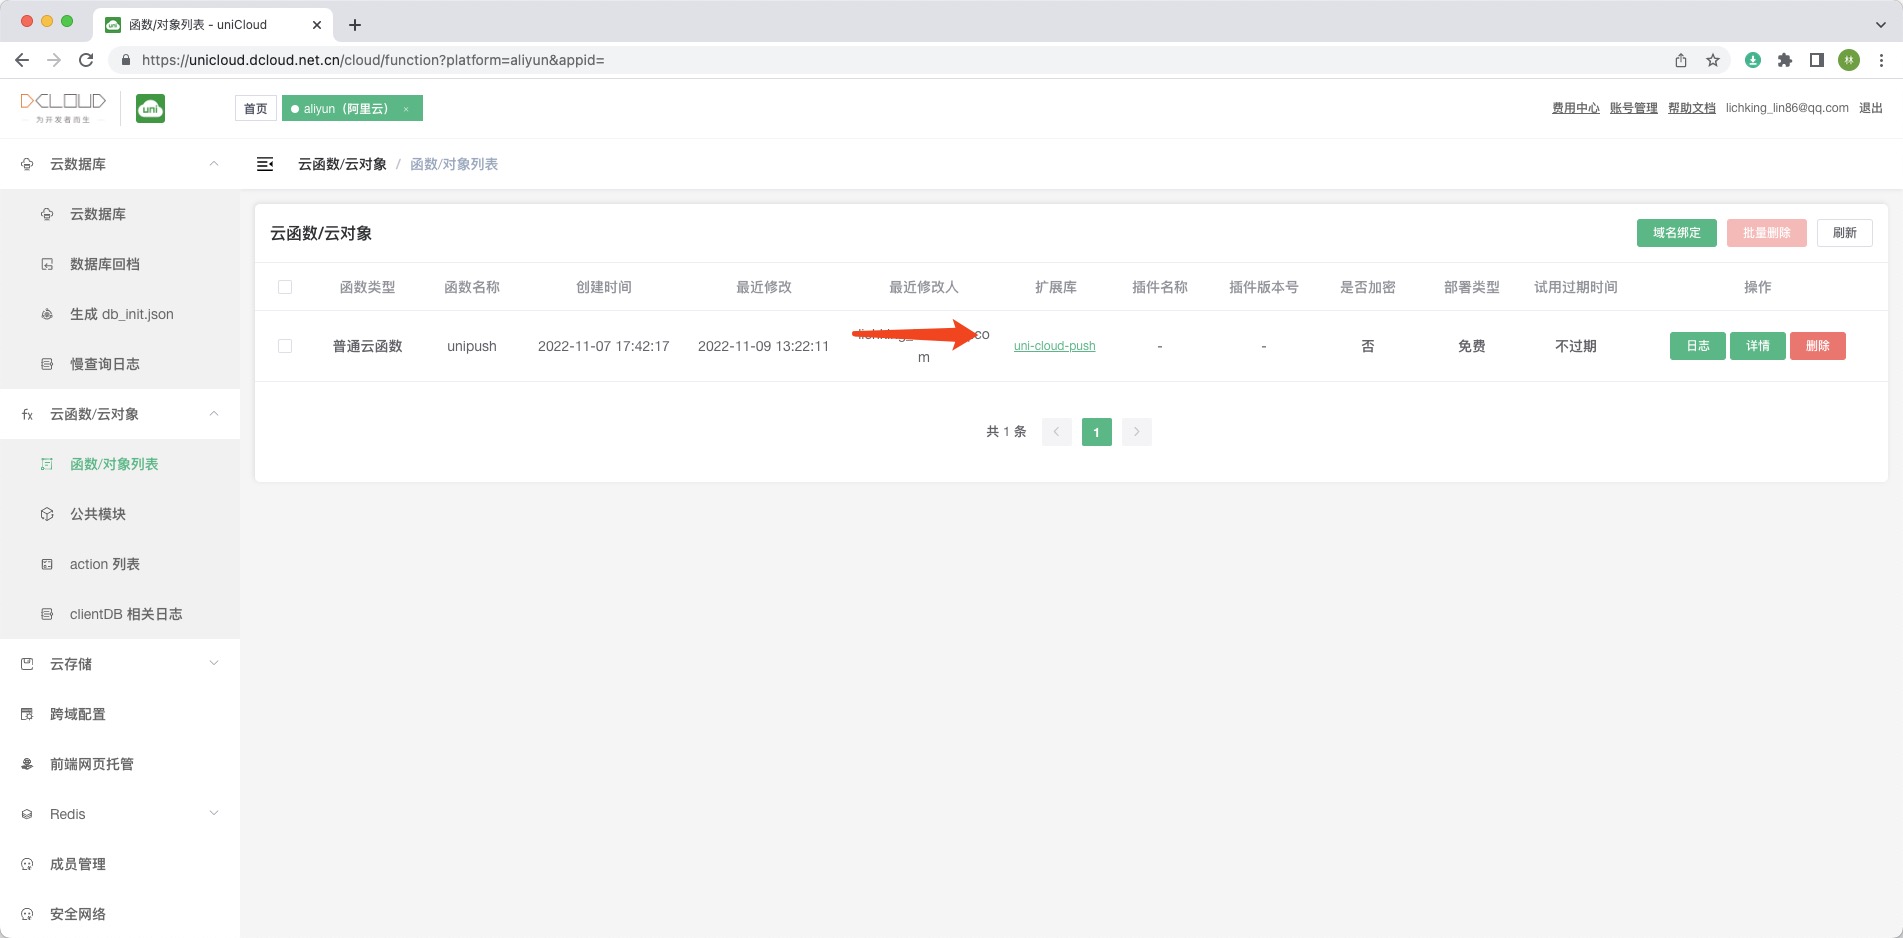
如果能看到上图这样的,表示你云函数已经好了。怕 dcloud 域名长不好记,可以绑定你自己备案过的域名。通过设置 CNAME 记录来映射。
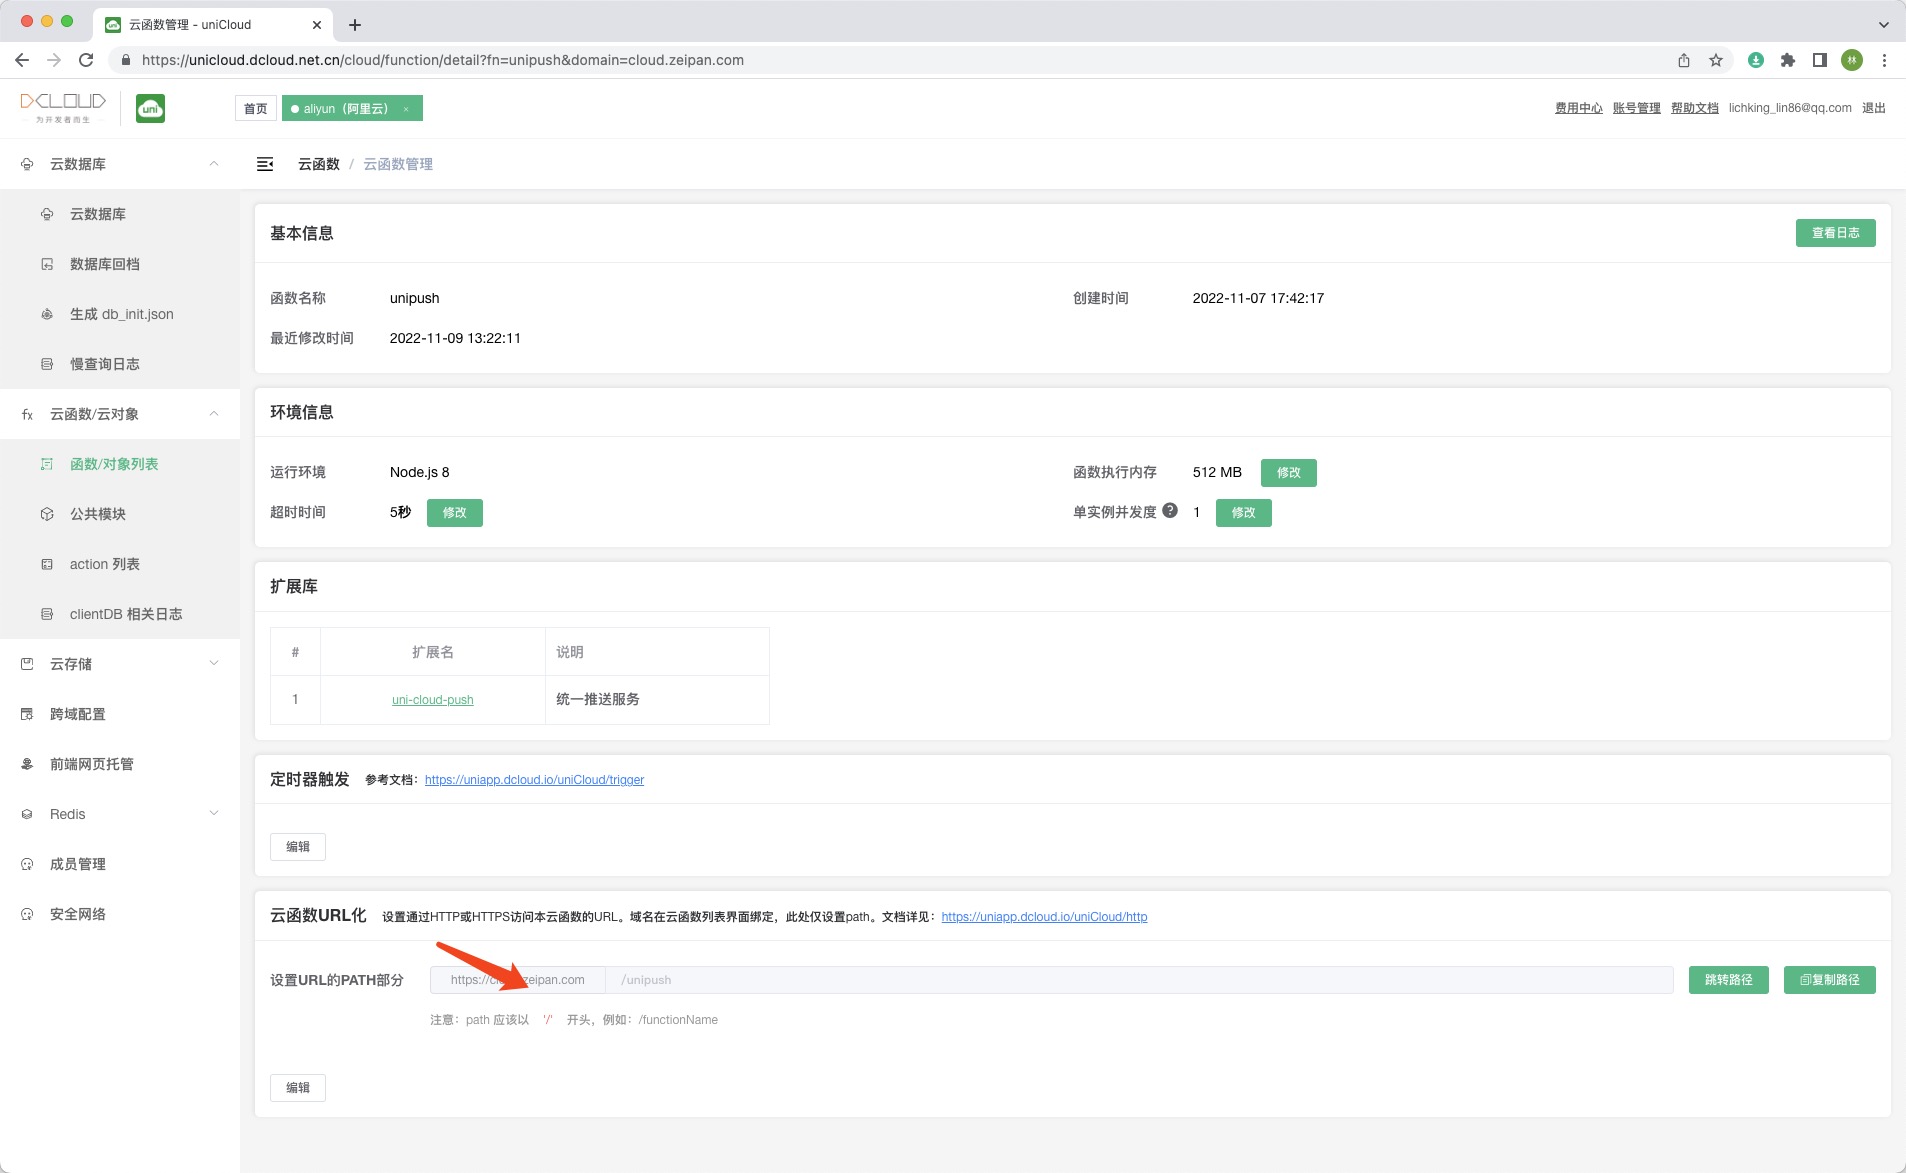
1.6 函数 url 化说明
在云函数->云函数管理 页面,点击页面底下的 云函数URL化 的编辑按钮,设置访问 path。
通过https://${云函数Url化域名}/${path}直接访问函数,其中${path}是配置的函数触发路径或其子路径。
https://${云函数Url化域名}/ 部分,你创建云空间的时候就有了。只是你如果自定义成自己的域名后,会变成你的域名。这些在云函数详情页面都会完全显示。我们只需要定义 path 部分。path 最好和函数名一致,这样比较好理解。比如叫 unipush, 就知道这个 url 是做推送用的。完整的 url 如:https://xxx.com/unipush 简单吧,自定义的域名短呀短,好记呀好记。
1.7 使用 postman 调用该函数(就是以 get 方式访问该 url,参数记得要带上。访问方式要注意 get 和 post 会有所不同)
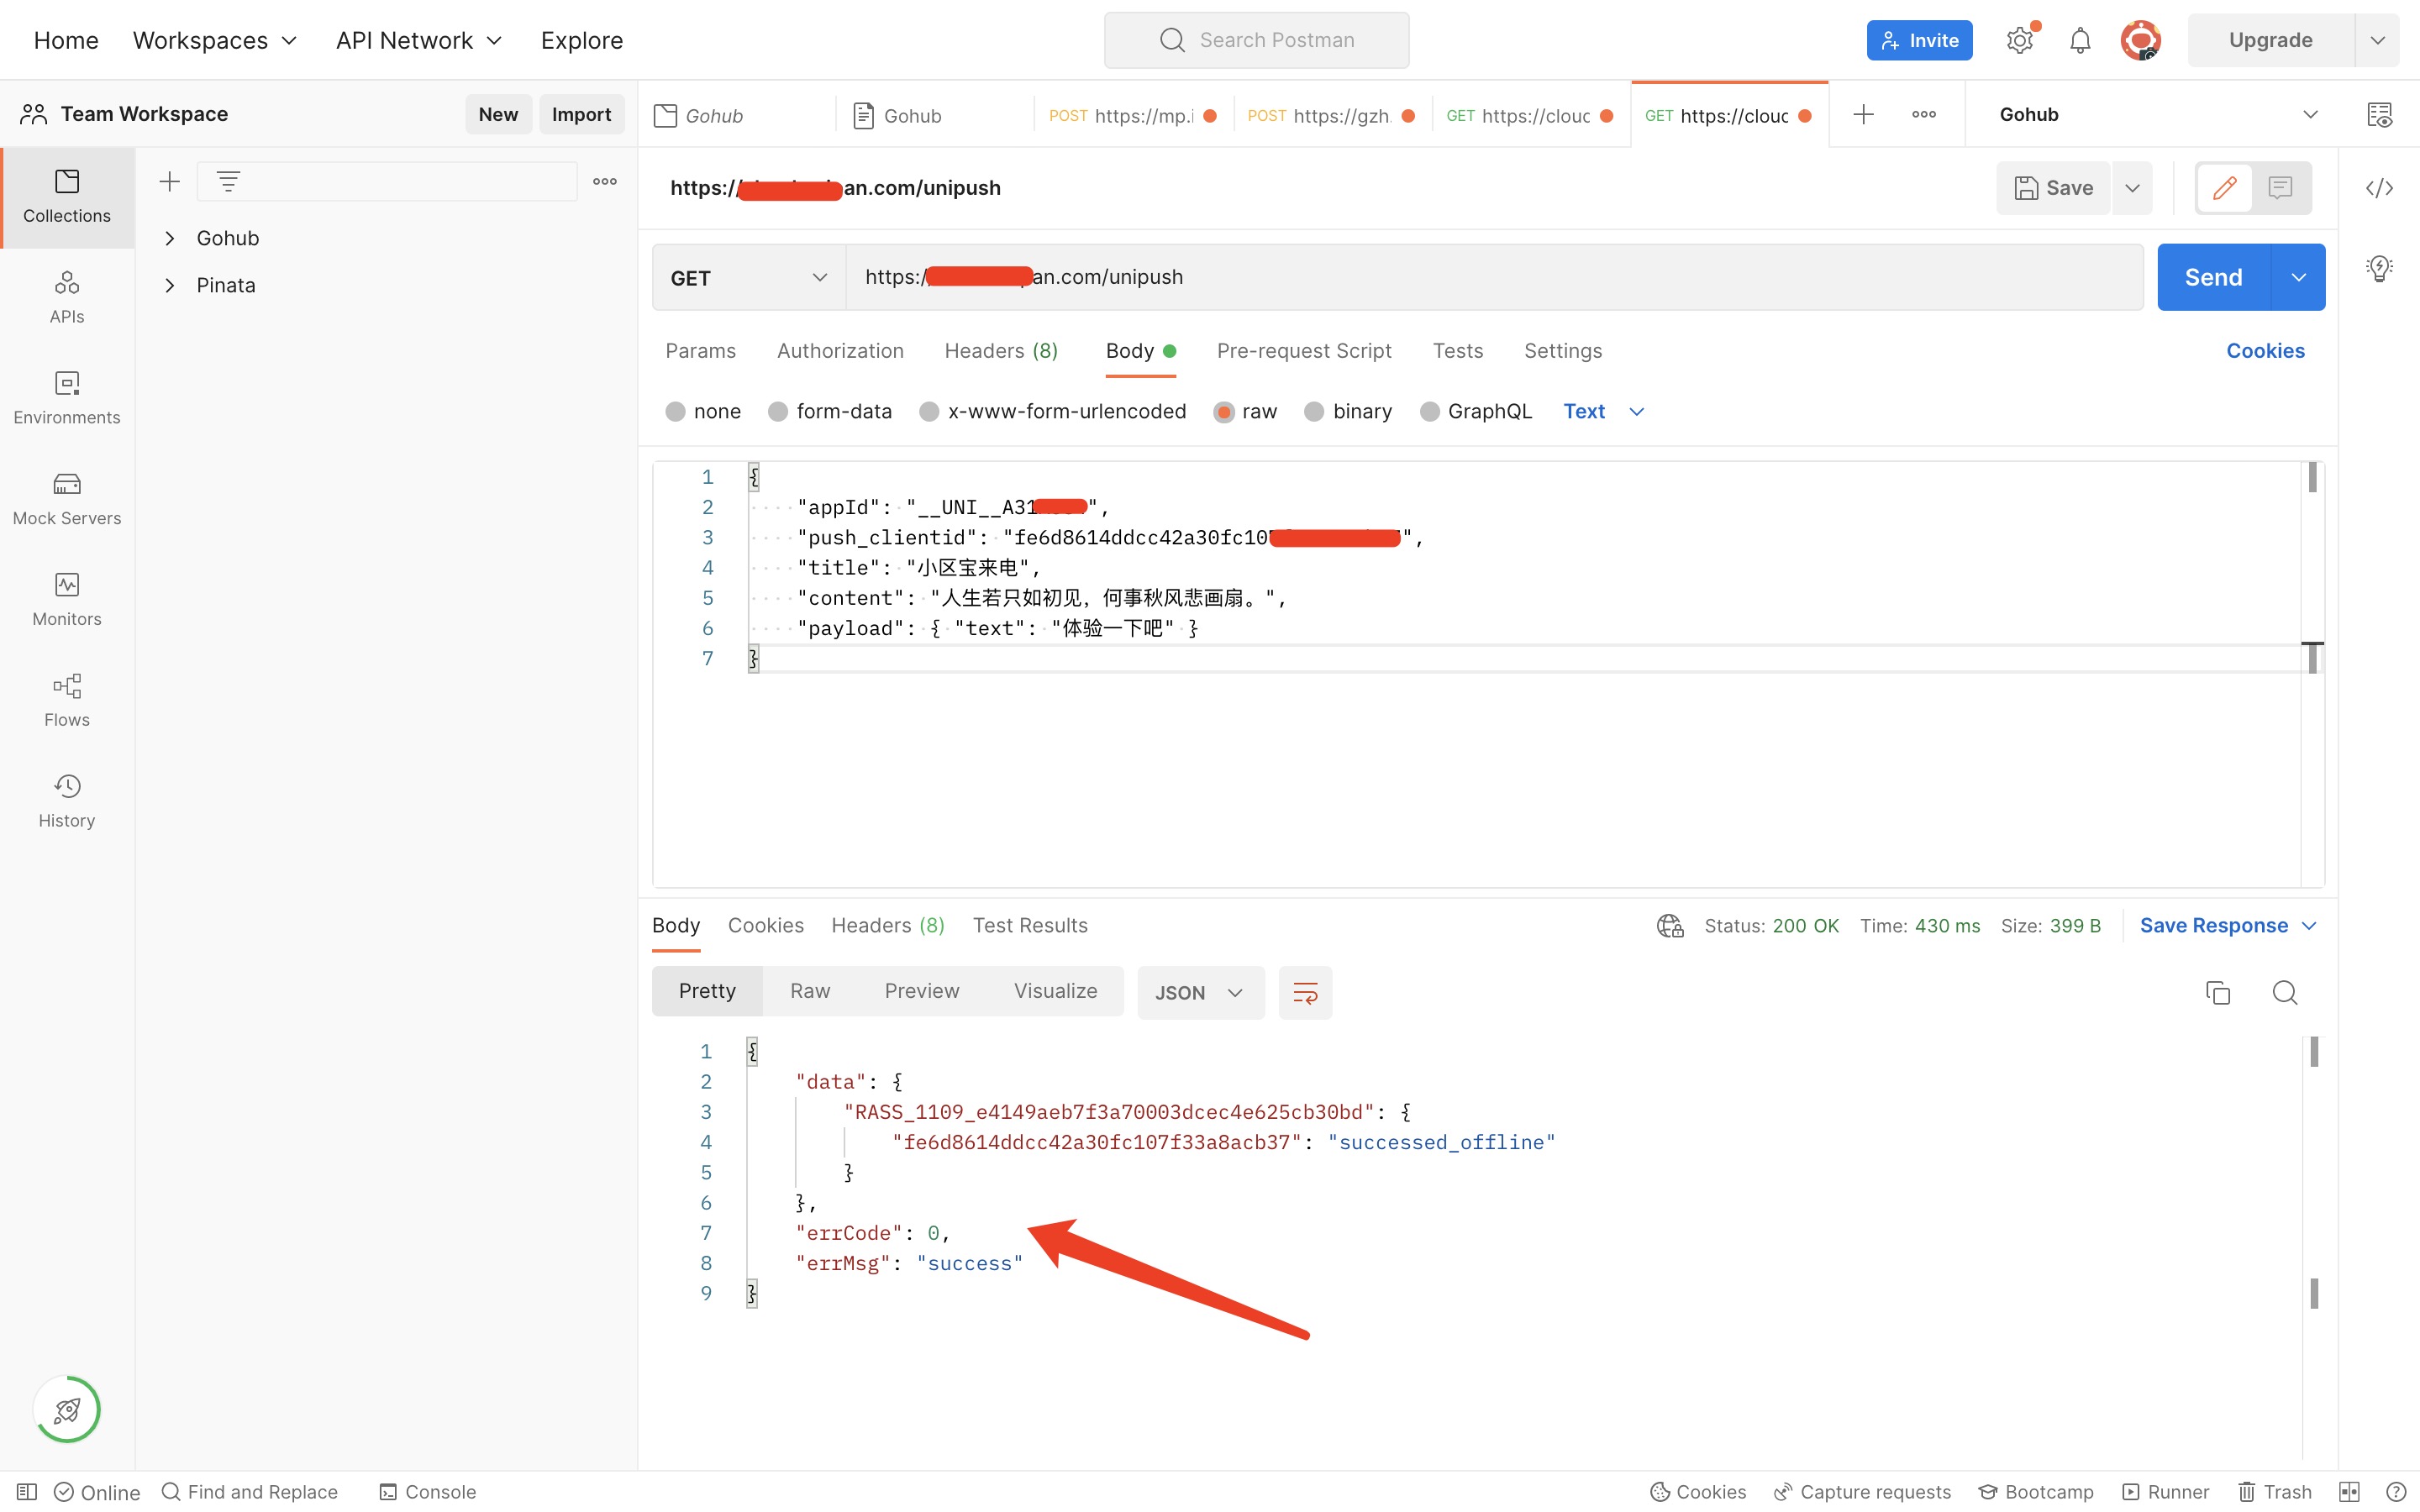
postman 配置如上图所示。这里没有任何授权,也就是任何人都可以调用。注意保护好隐私。
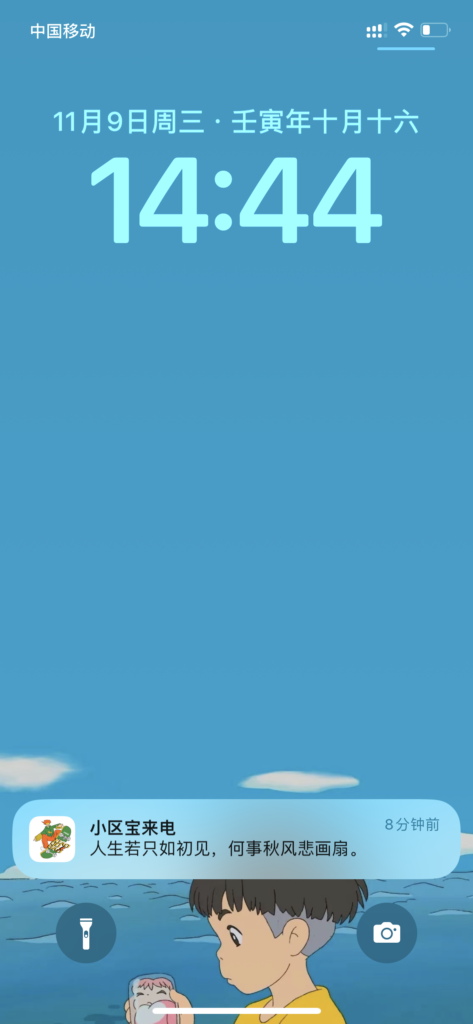
手机端接受到推送效果如上图所示。
1.8 上边算是测试完成了。你可以在自己的服务端如 php、java、go等服务端去请求 url 调用。
这里是 php 的实例:
        $data = [
            'appId' => '__UNI__Axxxxx,
            'push_clientid' => 'fe6d8614ddcc42a30fc10xxxxxxx',
            'title' => '小区宝来电',
            'content' => '人生若只如初见,何事秋风悲画扇。',
            'payload' => ['text' => '体验一下吧'],
        ];

        curl('https://xxxx.com/unipush', json_encode($data), true, true);

        /**
         * @param string $url 请求网址
         * @param bool $params 请求参数
         * @param bool $post 请求方式,是否是post
         * @param bool $https 请求http协议,是否是https
         * @return bool|mixed
         */
        function curl($url, $params = false, $post = false, $https = false)
        {
            $httpInfo = array();
            $ch = curl_init();
            curl_setopt($ch, CURLOPT_HTTP_VERSION, CURL_HTTP_VERSION_1_1);
            curl_setopt($ch, CURLOPT_USERAGENT, 'Mozilla/5.0 (Windows NT 10.0; WOW64) AppleWebKit/537.36 (KHTML, like Gecko) Chrome/41.0.2272.118 Safari/537.36');
            curl_setopt($ch, CURLOPT_CONNECTTIMEOUT, 30);
            curl_setopt($ch, CURLOPT_TIMEOUT, 30);
            curl_setopt($ch, CURLOPT_RETURNTRANSFER, true);

            if ($post === true) {
                curl_setopt($ch, CURLOPT_POST, true);
                curl_setopt($ch, CURLOPT_POSTFIELDS, $params);
                curl_setopt($ch, CURLOPT_URL, $url);
            } else {
                if ($params === false) {
                    curl_setopt($ch, CURLOPT_URL, $url);
                } else {
                    if (is_array($params)) {
                        $params = http_build_query($params);
                    }
                    curl_setopt($ch, CURLOPT_URL, $url . '?' . $params);
                }
            }

            if ($https === true) {
                curl_setopt($ch, CURLOPT_SSL_VERIFYPEER, false); // 对认证证书来源的检查
                curl_setopt($ch, CURLOPT_SSL_VERIFYHOST, false); // 从证书中检查SSL加密算法是否存在
            }
            $response = curl_exec($ch);
            if ($response === false) {
                Illuminate\Support\Facades\Log::error(sprintf('curl 错误。 url:%s, error:%s', $url, curl_error($ch)));
                return false;
            }
            $httpCode = curl_getinfo($ch, CURLINFO_HTTP_CODE);
            $httpInfo = array_merge($httpInfo, curl_getinfo($ch));
            curl_close($ch);
            return $response;
        }