https://developers.weixin.qq.com/miniprogram/dev/component/xr-frame/overview/#%E6%A6%82%E8%BF%B0
基于xr-frame实现微信小程序的图片扫描识别AR功能,通过编写节点就能完成。这里使用 uniapp 构建。
基本操作
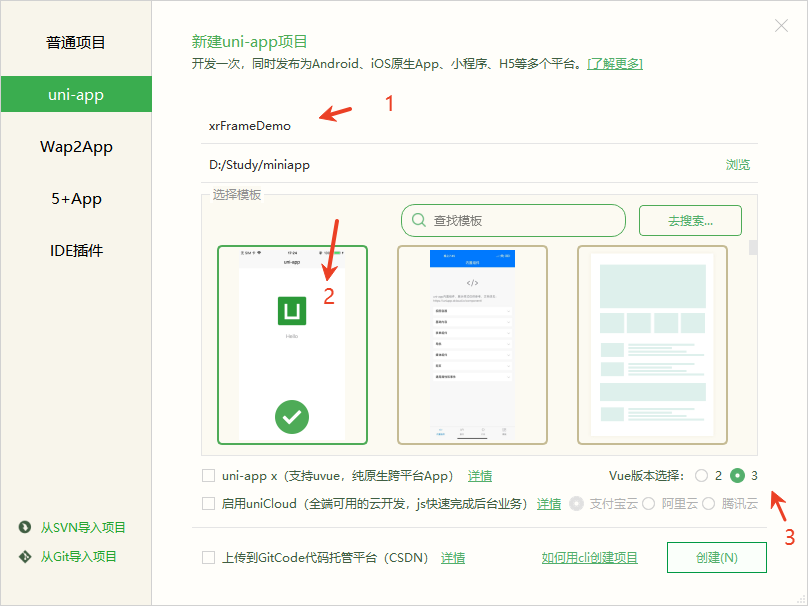
- 使用 uniapp 创建一个默认项目。 文件->创建->项目
- 在项目根目录下创建 wxcomponents 目录。在该目录下创建 xrtracker 目录,这个目录用来存放微信小程序的代码。在这个目录中创建。 index.json,index.wxml,index.js 文件。
index.json
{
    "component": true,
    "renderer": "xr-frame",
    "usingComponents": {}
}
index.wxml
<xr-scene>
    <xr-camera id="camera" clear-color="0.2 0.4 0.6 1" camera-orbit-control/>
</xr-scene>
index.js
Component({
    properties: {
    },
    data:{
    },
    lifetimes: {

    },
    methods: {

    }
})
-
这里直接在默认的 pages/index/index.vue 中修改。内容如下。
<template>
<xr-tracker></xr-tracker>
</template>
-
修改 pages.json,将微信小程序组件引入进来。
        "path": "pages/index/index",
        "style": {
            "navigationBarTitleText": "uni-app",
            // #ifdef MP-WEIXIN
            "usingComponents": {
                "xr-tracker": "/wxcomponents/xrtracker/index"
            }
            // #endif
        }
-
还得打开 manifest.json 文件,在 mp-weixin 节点增加以下配置。
"mp-weixin" : {
    "appid" : "xxxx",
    "setting" : {
        "urlCheck" : false,
        "es6" : true,
        "postcss" : false,
        "minified" : true
    },
    "usingComponents" : true,
    "lazyCodeLoading" : "requiredComponents"
},
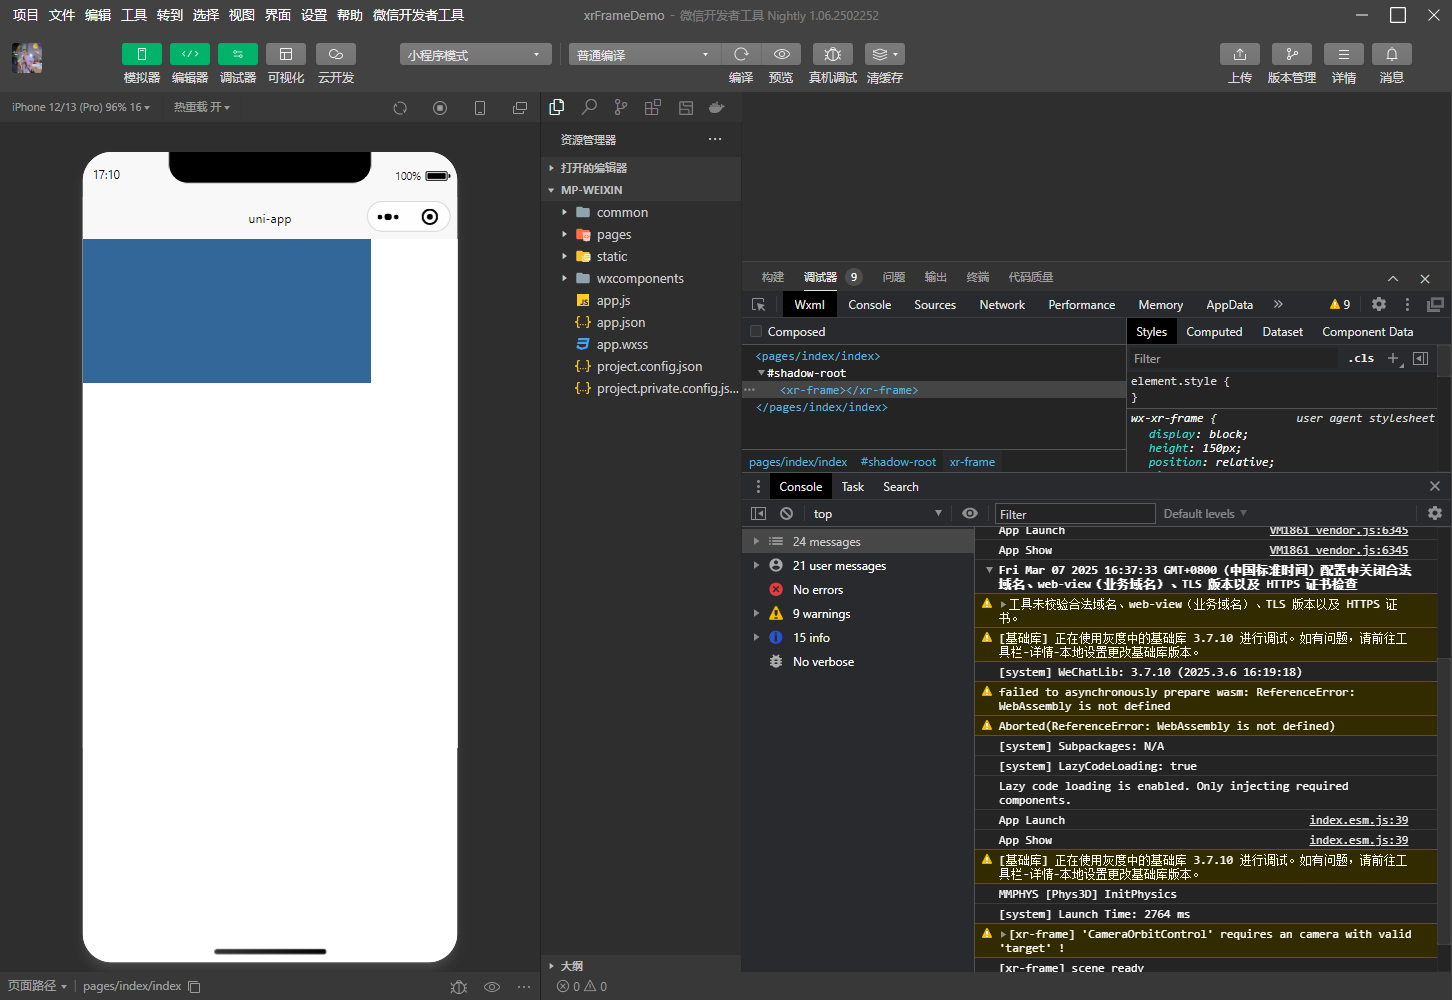
做好上边几步,可以开始运行起来。如下图所示 。到此,一个基本的 xr-frame 调用就完成了。
下边来调整样式,使得显示好看一些 。修改 pages/index/index.vue 如下:
<template>
    <xr-tracker disable-scroll :width="renderWidth" :height="renderHeight" :style="style"></xr-tracker>
</template>

<script setup>
    import { ref, computed } from 'vue'
    import { onLoad } from '@dcloudio/uni-app'

    const width = ref(300)
    const height = ref(300)
    const renderWidth = ref(300)
    const renderHeight = ref(300)

    const style = computed(() => {
        return `width:${width.value}px;height:${height.value}px;`
    })

    onLoad(() => {
        const windowInfo = uni.getWindowInfo()
        width.value = windowInfo.windowWidth
        height.value = windowInfo.windowHeight
        renderWidth.value = windowInfo.windowWidth * windowInfo.pixelRatio
        renderHeight.value = windowInfo.windowHeight * windowInfo.pixelRatio
    })
</script>
识图
https://developers.weixin.qq.com/miniprogram/dev/component/xr-frame/ar/tracker.html#%E4%BA%8C%E7%BB%B4Marker
https://developers.weixin.qq.com/miniprogram/dev/component/xr-frame/ar/#%E4%B8%8D%E5%90%8CAR%E8%BF%BD%E8%B8%AA%E5%99%A8%E7%9A%84%E5%9D%90%E6%A0%87%E7%B3%BB%E5%B7%AE%E5%BC%82
要实现识图过程,得用到 ar 追踪器。使用到的标签有根标签 xr-scene,有资源标签 xr-assets,节点标签 xr-node,还有追踪器标签 xr-ar-tracker。以及 xr-camera 和 xr-light 等。
这里至少需要一张图片url(识别对象),一个模型文件(通常是模型。其他也是可以)。如果涉及到声音,还需要音频文件。为了方便,这里定义三个属性给到外部。
部分代码如下。
<xr-scene ar-system="modes:Marker" bind:ready="handleReady" bind:ar-ready="handleARReady">
    <!-- 资源加载 -->
  <xr-assets bind:progress="handleAssetsProgress" bind:loaded="handleAssetsLoaded">
    <xr-asset-load type="gltf" asset-id="gltf-model" src="{{modelUrl}}" />
  </xr-assets>

  <xr-env env-data="xr-frame-team-workspace-day" />

  <xr-node wx:if="{{arReady}}">
    <xr-ar-tracker mode="Marker" src="{{markerImgUrl}}" bind:ar-tracker-switch="handleTrackerSwitch">
      <xr-gltf position="0 0 0" scale="1 1 1" rotation="-108 -90 90" anim-autoplay model="gltf-model" bind:gltf-loaded="handleGLTFLoaded" />
    </xr-ar-tracker>

    <xr-camera id="camera" node-id="camera" clear-color="0 0 0 0" position="1 1 2" background="ar" is-ar-camera camera-orbit-control/>
  </xr-node>

  <xr-node node-id="lights">
    <xr-light type="ambient" color="1 1 1" intensity="1" />
    <xr-light type="directional" rotation="180 0 0" color="1 1 1" intensity="3" />
  </xr-node>
</xr-scene>
然后修改 index.js 文件,来适配 wxml 文件。比如在识别成功后播放音频。
        handleTrackerSwitch({ detail }) {
            const { value } = detail;
            if (value) {
                console.log("识别成功,展示模型");

                if (this.audioContext) {
                    this.audioContext.play()
                }
            } else {
                console.log("识别失败或 Marker 失去跟踪");
            }
        },